Craving a taste of the Mediterranean? Look no further! This Homemade Hummus recipe is incredibly easy to make and packed with flavor. I’ll guide you through each step to achieve the creamiest hummus imaginable. But here’s the secret: we’re adding a unique twist with preserved lemon! This recipe provides both a detailed guide and helpful tips to elevate your hummus game.
Why You’ll Love This Homemade Hummus Recipe
This isn’t your average hummus. The addition of preserved lemon transforms it into something truly special.
- Unique, complex flavor: The preserved lemon brings a bright, salty, and subtly fermented flavor that elevates the hummus beyond ordinary versions. I love the hint of umami it provides!
- Creamy, smooth texture: This recipe guarantees a luxuriously smooth and creamy texture.
- Easy to make at home: Forget store-bought hummus! You’ll be surprised how simple it is to whip up a batch in your own kitchen.
- Perfect for meal prepping and healthy snacking: Hummus is a fantastic healthy snack and an excellent addition to your weekly meal prep.
- Impressive appetizer for parties and gatherings: Want to wow your guests? This preserved lemon hummus is sure to be a hit at your next party or gathering. You can also serve it with other appetizers such as classic caprese salad.
Ingredients Needed

- 8 ounces (227) dried chickpeas ((1 cup + 2 tbsp)(See Note 1))
- 1 teaspoon baking soda, (divided)
- A generous ¾ cup (~185g) good-quality tahini
- 6 tablespoons freshly squeezed lemon juice, (plus more to taste)
- 3 cloves garlic, (chopped (See Note 2))
- 1 teaspoon ground cumin, (plus more to taste)
- Diamond Crystal kosher salt ((see Note 3))
- Freshly cracked black pepper
- 6 to 10 tablespoons (90 to 150 mL) ice water
- ⅓ cup (75g) good-quality extra virgin olive oil
- 5 large cloves garlic, (thinly sliced)
- 4 to 6 strips of lemon peel, (about 2 inches long (don’t peel too deeply to avoid the white pith))
- Flaky sea salt or kosher salt
- 1 handful of flat-leaf parsley, (chopped )
- Paprika or Aleppo pepper ((or sumac) )
- Warm pita or lavash bread (for dipping)
Ingredient Notes & Substitutions
Let’s talk ingredients! Here’s a breakdown to ensure your homemade hummus turns out perfectly.
Chickpeas (dried vs canned): While canned chickpeas are convenient, dried chickpeas, cooked from scratch, will give you the absolute best texture. If you opt for canned, I recommend simmering them in water for 10-15 minutes to soften them up a bit. To learn more, you might find information on the nutritional value and health benefits of chickpeas helpful.
Tahini (types, brands, bitterness): High-quality tahini is key. Look for tahini made from hulled sesame seeds, which will be smoother and less bitter. Brands like Soom and Seed + Mill, available in the US, are excellent choices. If your tahini is very thick, you may need to add a bit more ice water to the hummus. If it’s thin, you might need slightly less.
Lemon juice (fresh vs bottled): Freshly squeezed lemon juice is always best for its bright, vibrant flavor. If you must use bottled, start with 4 tablespoons and adjust to taste.
Salt (types, amounts): I prefer Diamond Crystal kosher salt because of its flakiness. If using a different brand, especially table salt, use a kitchen scale for consistent results as Diamond Crystal measures differently by volume compared to other brands.
Olive oil: Use a good-quality extra virgin olive oil. The flavor really shines through, both in the hummus itself and in the fried garlic-lemon topping. You can read more about what constitutes extra virgin olive oil on AboutOliveOil.org.
This recipe is naturally vegan, gluten-free, and nut-free, making it a great choice for various dietary needs. For another delicious vegan option, consider trying these vegan lettuce wraps with teriyaki tempeh.

How to Make Homemade Hummus
Ready to make the best homemade hummus you’ve ever tasted? Follow these simple steps!
Soak the Chickpeas
Add the chickpeas to a large bowl, cover them with cold water, and stir in ½ teaspoon of baking soda. The baking soda helps to soften the chickpeas, resulting in a smoother hummus. Let them soak for 8 hours or overnight. Drain and rinse thoroughly.
Cook the Chickpeas
Add the drained chickpeas to a medium saucepan along with ½ teaspoon of baking soda and 6 cups (1.4 L) of water. Bring the mixture to a boil over medium-high heat, then reduce the heat to maintain a rapid simmer – that means the water is bubbling steadily but not violently. Cover the pot and cook for 30 minutes. Uncover the pot and add 1 teaspoon of kosher salt. Continue cooking for another 10 to 15 minutes, or until the chickpeas are very soft. They should easily smush when pressed with a spoon, fork, or between your fingers. Drain the chickpeas well.
Blend the Chickpeas
Transfer the drained chickpeas to a food processor. Blend for 1-2 minutes until you have a smooth puree, pausing to scrape down the sides of the bowl as needed. You’ll hear the food processor working hard, and you’ll start to smell that familiar, nutty chickpea aroma.
Add Tahini, Lemon, Garlic, and Cumin
Add the tahini, lemon juice, garlic, cumin, 1 heaping teaspoon of kosher salt, and black pepper to taste to the food processor. Blend until combined. With the motor running, slowly stream in the ice water, 1 tablespoon at a time. After 6 tablespoons, evaluate the texture. If it’s still too stiff, continue streaming in more water, 1 tablespoon at a time, until it reaches your desired consistency. The ice water is key to achieving a light and fluffy texture. As you blend, the aroma will become even more complex and inviting. Once you reach your desired texture, taste and adjust the seasonings, adding more salt, garlic, cumin, or lemon juice as needed to achieve your perfect flavor balance.
Make the Fried Lemon-Garlic Topping
Fit a fine-mesh sieve over a bowl. Add the olive oil to a medium frying pan and turn to medium heat. Once the oil is warm (but not too hot), add the thinly sliced garlic and cook, swirling the pan or stirring frequently, for 2 to 2 ½ minutes, until the garlic just turns golden. Be careful not to let it brown too much – burnt garlic will become bitter! You’ll start to smell the fragrant garlic as it cooks. Add the lemon peel strips and cook for another 30 seconds, stirring almost constantly. Remove from the heat and pour the mixture into the strainer, reserving the infused oil in the bowl. Transfer the fried garlic and lemon zest to a plate and sprinkle them with a bit of flaky sea salt.
Assemble and Serve
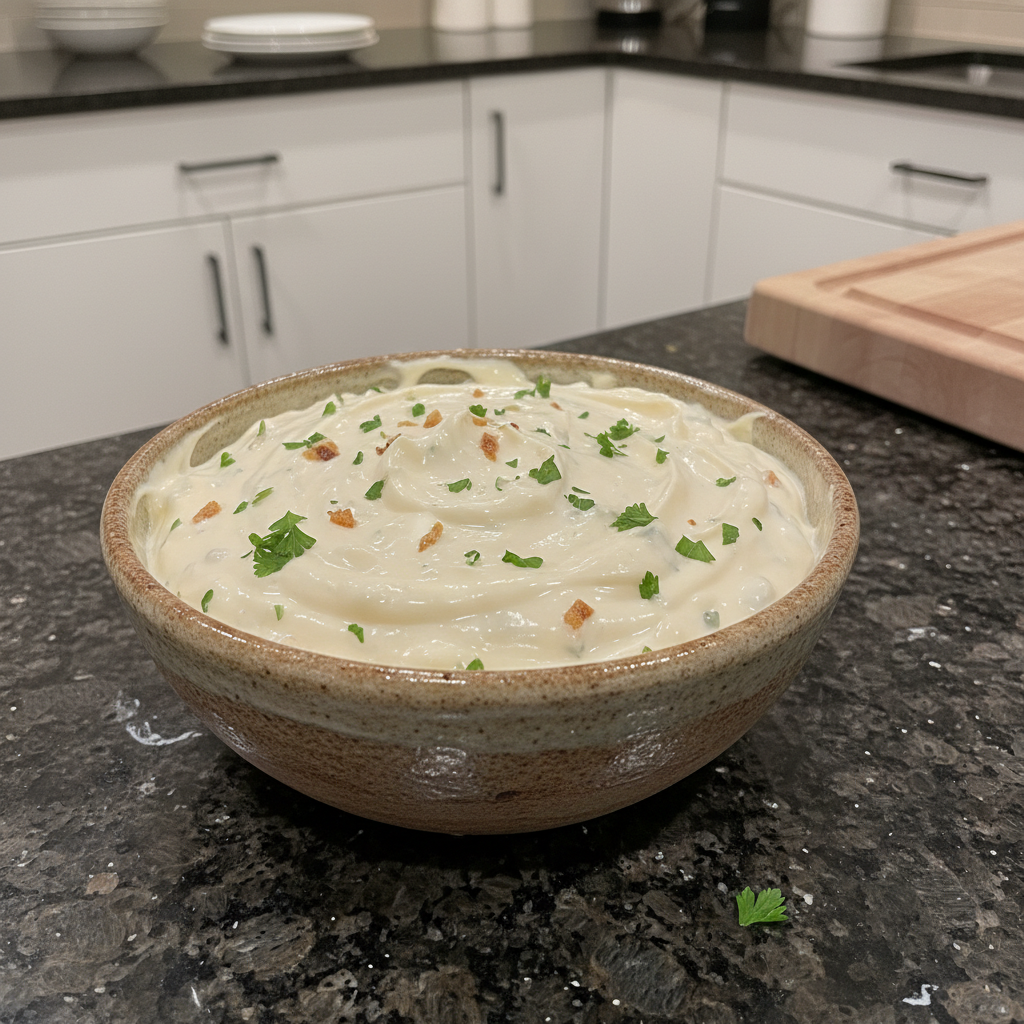
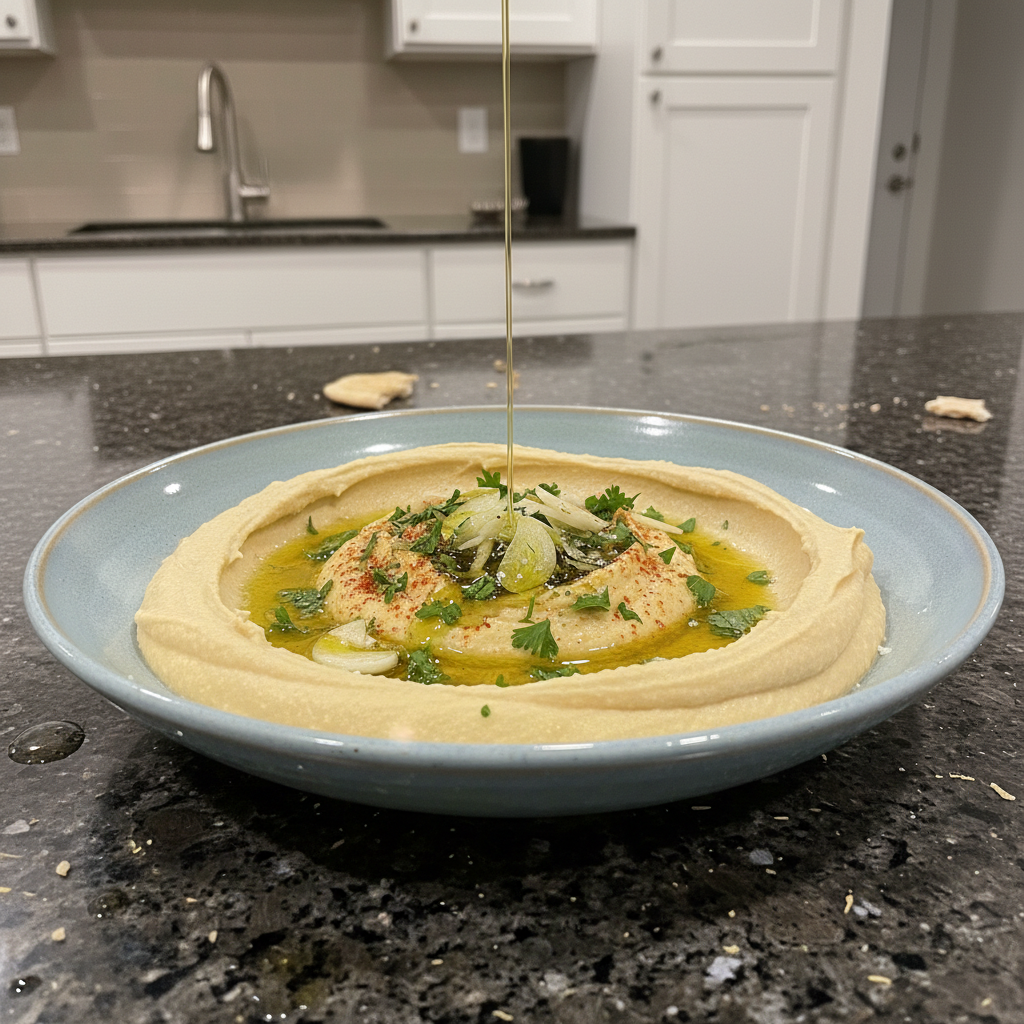
Transfer the hummus to a shallow bowl or plate with a lip. Use the back of a spoon to create waves or a well in the center. Spoon the reserved garlic-lemon infused oil into the ridges or the well. Top with the fried garlic and lemon zest mixture. Sprinkle with chopped parsley and a few shakes of paprika or Aleppo pepper for a touch of color and spice. Serve immediately with warm pita bread for dipping. The final presentation is visually appealing and bursting with flavor!
Troubleshooting Hummus: Common Problems and Solutions
Sometimes, things don’t go quite as planned. Here’s how to fix some common hummus problems:
- Hummus is too thick:
- Possible causes: Not enough liquid, over-blending, or tahini that is too thick.
- Solutions: Add more ice water, one tablespoon at a time, until the desired consistency is reached. Ensure the tahini is well-stirred before adding it.
- Hummus is too bitter:
- Possible causes: Low-quality tahini (made with unhulled sesame seeds), burnt garlic, or too much lemon zest (including the white pith).
- Solutions: Use high-quality tahini from hulled sesame seeds. Watch the garlic carefully while frying and remove it from the heat as soon as it turns golden. Avoid including the white pith when zesting the lemon.
- Hummus is bland:
- Possible causes: Not enough salt, lemon juice, or cumin.
- Solutions: Taste and adjust seasonings as needed. Add more salt, lemon juice, or cumin, one small increment at a time, until the desired flavor is achieved. Consider adding a pinch of cayenne pepper for a subtle kick.
Pro Tips & Troubleshooting
Here are a few extra tips to ensure hummus success!
Pro Tips
- Simmer canned chickpeas: If you’re using canned chickpeas, simmer them in water for 10-15 minutes to soften them and achieve an even smoother hummus.
- Use ice water: Ice water is crucial for achieving a light and fluffy texture. Don’t skip it!
- Don’t skimp on the tahini: Good-quality tahini is essential for a rich and nutty flavor.
- Taste as you go: Adjust the seasonings (salt, lemon juice, cumin) to your personal preference.
Common Mistakes to Avoid
- Burning the garlic: Burnt garlic will make the hummus bitter. Watch it carefully while frying.
- Using bitter tahini: Choose tahini made from hulled sesame seeds.
- Over-processing: Over-processing can make the hummus gummy. Blend until just smooth.
- Not using enough salt: Salt is essential for balancing the flavors.
Serving & Storage
Here’s how to best enjoy and store your delicious homemade hummus.
Serving Ideas
- Mezze platter: Serve with falafel, tabbouleh, and tzatziki for a complete Mediterranean feast.
- Sandwich spread: Use as a healthy and flavorful spread on sandwiches or wraps.
- Bowl topper: Top grain bowls or salads with a dollop of hummus for added protein and flavor.
- Garnishes: Garnish with chopped parsley, paprika, Aleppo pepper, or a drizzle of olive oil.
- Serve with warm pita bread, fresh vegetables (carrots, cucumbers, bell peppers), or crackers. Want a crunchy and flavorful snack? Try serving with these crispy garlic baked chickpeas!
Storage and Make-Ahead
- Fridge: Store in an airtight container in the refrigerator for up to 5 days. To prevent drying out, drizzle a thin layer of olive oil over the top before storing.
- Freezer: Hummus can be frozen for up to 3 months. Thaw overnight in the refrigerator. The texture may change slightly after freezing.
Conclusion
This homemade hummus recipe is a game-changer! The creamy texture and unique preserved lemon flavor make it a standout dish. Even if you’re a beginner, the recipe is straightforward, and the preserved lemon adds a touch of sophistication. Feel free to experiment with different serving ideas or variations like roasted red pepper hummus. Try this recipe today and elevate your hummus game! Share your creations with us on social media.
FAQ
Got questions? I’ve got answers!
- Can I use canned chickpeas to make hummus? If so, how does the process change?
Yes, canned chickpeas can be used. Simmer them for 10-15 minutes before blending to soften them.
- What tahini brands do you recommend? Why are some tahini brands better than others?
I recommend brands like Soom and Seed + Mill, which are available in the US. High-quality tahini is made from hulled sesame seeds and has a smooth, creamy texture and nutty flavor.
- I don’t have a food processor. Can I use a blender instead? What are the modifications needed?
Yes, a blender can be used. You may need to add more liquid to help the ingredients blend smoothly. Stop and scrape the sides of the blender as needed.
- How long does homemade hummus last? How should it be stored to maximize freshness?
Homemade hummus lasts for up to 5 days in the refrigerator. Store in an airtight container and drizzle with olive oil to prevent drying.
- How do you serve leftover hummus? Can it be reheated?
Serve leftover hummus as a dip with vegetables or pita bread, as a spread on sandwiches, or as a topping for salads or grain bowls. It can be reheated in the microwave or on the stovetop, but the texture may change slightly.
- Can you freeze hummus? How does freezing affect the texture?
Hummus can be frozen for up to 3 months. The texture may change slightly after freezing, becoming a bit grainier. Thaw overnight in the refrigerator.
- How do you prevent hummus from drying out?
Store hummus in an airtight container and drizzle a thin layer of olive oil over the top before refrigerating. To keep it fresh you could try a crisp cucumber salad recipe, which will taste amazing combined with the hummus.
Homemade Hummus: The Creamiest Recipe with a Preserved Lemon Twist
Ingredients
Equipment
Method
- Add the chickpeas to a large bowl, cover them with cold water, and stir in ½ teaspoon of baking soda. Let them soak for 8 hours or overnight. Drain and rinse thoroughly.
- Add the drained chickpeas to a medium saucepan along with ½ teaspoon of baking soda and 6 cups (1.4 L) of water. Bring the mixture to a boil over medium-high heat, then reduce the heat to maintain a rapid simmer. Cover the pot and cook for 30 minutes. Uncover the pot and add 1 teaspoon of kosher salt. Continue cooking for another 10 to 15 minutes, or until the chickpeas are very soft. Drain the chickpeas well.
- Transfer the drained chickpeas to a food processor. Blend for 1-2 minutes until you have a smooth puree, pausing to scrape down the sides of the bowl as needed.
- Add the tahini, lemon juice, garlic, cumin, 1 heaping teaspoon of kosher salt, and black pepper to taste to the food processor. Blend until combined. With the motor running, slowly stream in the ice water, 1 tablespoon at a time. After 6 tablespoons, evaluate the texture and add more water until it reaches your desired consistency. Taste and adjust the seasonings.
- Fit a fine-mesh sieve over a bowl. Add the olive oil to a medium frying pan and turn to medium heat. Once the oil is warm, add the thinly sliced garlic and cook, swirling the pan or stirring frequently, for 2 to 2 ½ minutes, until the garlic just turns golden. Add the lemon peel strips and cook for another 30 seconds, stirring almost constantly. Remove from the heat and pour the mixture into the strainer, reserving the infused oil in the bowl. Transfer the fried garlic and lemon zest to a plate and sprinkle them with a bit of flaky sea salt.
- Transfer the hummus to a shallow bowl or plate with a lip. Use the back of a spoon to create waves or a well in the center. Spoon the reserved garlic-lemon infused oil into the ridges or the well. Top with the fried garlic and lemon zest mixture. Sprinkle with chopped parsley and a few shakes of paprika or Aleppo pepper. Serve immediately with warm pita bread for dipping.
Notes
Lia Monet is a food blogger, recipe developer, and the founder of EasyAsMeals, a food blog focused on easy recipes, quick dinners, and everyday home cooking. She creates tested, family-friendly recipes using simple ingredients to help busy families cook affordable and delicious meals at home.