Tired of searching for a good vegan butter at the grocery store, only to be disappointed by the taste or texture? Many store-bought options contain unwanted additives or just don’t quite measure up to the real thing. But what if you could easily make your own? With this recipe, you can! Learn how to make delicious, creamy, and spreadable homemade vegan butter using simple ingredients and a unique technique that guarantees perfect results every time. This dairy-free butter is perfect for all your cooking and baking needs.
Why You’ll Love This Homemade Vegan Butter Recipe
This vegan butter recipe isn’t just another substitute; it’s a game-changer. I’ve perfected it to be just as good, if not better, than traditional dairy butter.
The Secret Ingredient: This recipe includes a secret ingredient: sunflower lecithin. Just a small amount (1/2 tsp) makes a HUGE difference! Sunflower lecithin is a natural emulsifier that prevents separation, eliminates graininess, and ensures a perfectly smooth and spreadable butter, even straight from the fridge.
Easy to make: It’s surprisingly easy to make at home with simple ingredients you probably already have.
Dairy-free and vegan: Completely dairy-free and vegan, making it perfect for those with dietary restrictions.
Customizable: It’s easily customizable to your taste preferences with various flavor additions.
Versatile: Perfect for baking, cooking, and spreading – just like traditional butter!
Ingredients Needed

- 1 cup Refined Coconut Oil ((240ml) Melted*)
- 2 Tbsp Canola Oil (See Notes*)
- 1/3 cup Unsweetened Soy Milk (or Almond Milk (80ml))
- 1 tsp Apple Cider Vinegar
- 1 tsp Nutritional Yeast
- 1 Small Pinch Turmeric
- 1/2 tsp Salt
- 1/2 tsp Sunflower Lecithin
Ingredient Notes & Substitutions
Let’s break down each ingredient and explore some substitutions.
Coconut Oil: It’s crucial to use *refined* coconut oil in this recipe. Refined coconut oil has a neutral flavor, ensuring that your vegan butter doesn’t taste strongly of coconut. If you don’t mind a coconut flavor, you can use unrefined coconut oil, but be aware that it will be more pronounced.
Oil Options: I primarily use canola oil for its neutral taste and availability. However, avocado oil or even olive oil can be used as alternatives. Be cautious when using olive oil; over-blending can sometimes lead to a bitter taste. To avoid this, stir in olive oil (do not blend).
Milk Options: Unsweetened soy milk or almond milk work best in this recipe. For a simple guide, you can also make your own almond milk. Oat milk is another great option that provides a creamy texture.
Nutritional Yeast: This adds a cheesy, savory flavor that mimics the taste of dairy butter. You can learn more about nutritional yeast and its health benefits on Healthline.
Sunflower Lecithin: As mentioned, sunflower lecithin is the key to a smooth and creamy texture. It’s a superior emulsifier compared to other options, preventing separation and graininess. Information about the properties and applications of lecithin can be found on ScienceDirect.
Each ingredient plays a vital role: refined coconut oil provides structure, canola oil contributes to spreadability, soy milk adds moisture, apple cider vinegar aids in curdling, nutritional yeast enhances flavor, turmeric adds a touch of color, and salt balances the flavors.

How to Make Homemade Vegan Butter
Now, let’s get to the fun part: making your own homemade vegan butter! Follow these simple steps for perfect results.
Step 1: Prepare the Ingredients
Add the melted refined coconut oil to the blender jug along with the canola oil.
Step 2: Create Buttermilk
Add the apple cider vinegar to the unsweetened soy or almond milk and stir it in. Allow it to sit for a minute or two, so that it curdles into buttermilk. Add the buttermilk to the blender.
Step 3: Add Flavorings and Emulsifier
Add the nutritional yeast, a small pinch of turmeric, salt, and sunflower lecithin to the blender.
Step 4: Blend Until Smooth
Blend the mixture very well until it is completely smooth. This may take 2-3 minutes. Listen to the sound of the blender change as the mixture emulsifies, and watch the texture transform into a smooth, creamy consistency.
Step 5: Refrigerate to Set
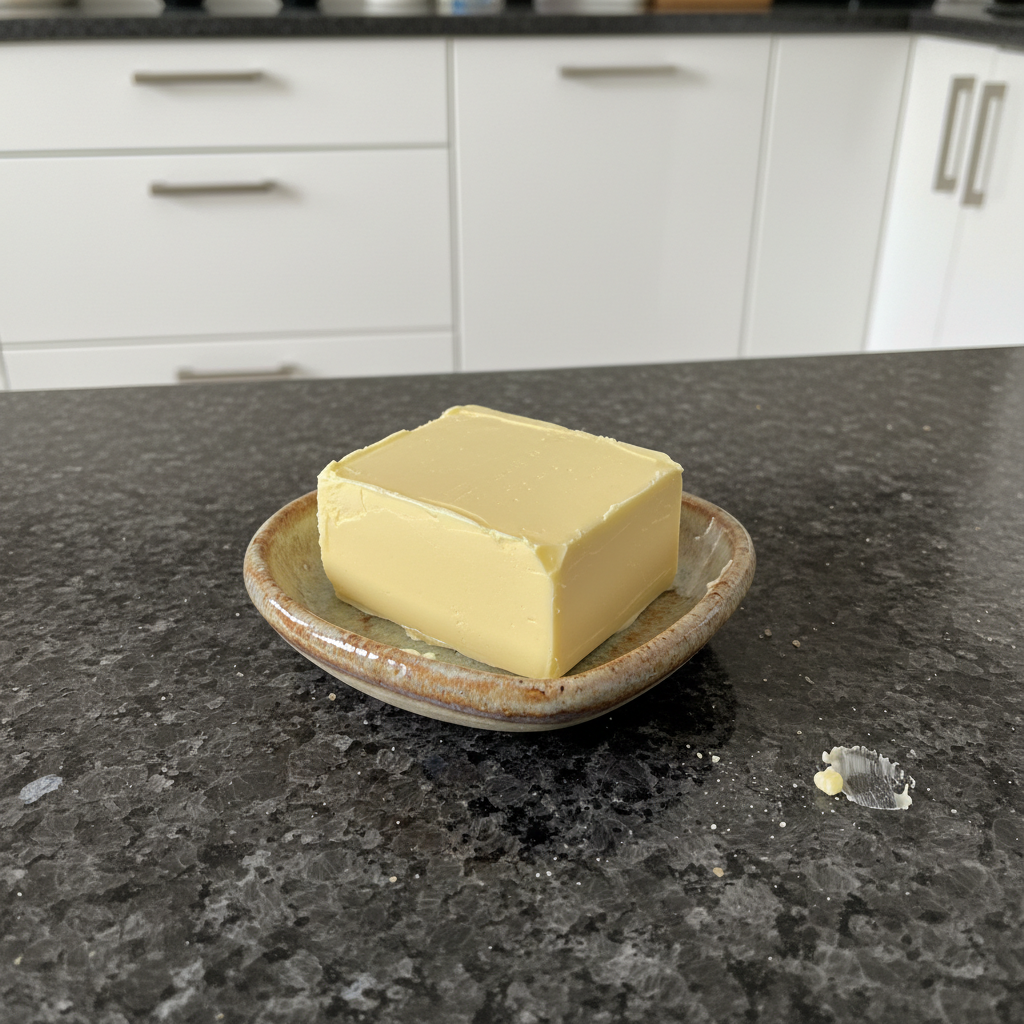
Pour the mixture out into a butter dish and refrigerate until it’s completely set.
Step 6: Serve
Remove from the fridge to thaw for a few minutes if using on fresh bread or creaming with sugar for baking. Enjoy your delicious homemade vegan butter!
Flavor Variations
One of the best things about making your own vegan butter is the ability to customize the flavor! Here are a few ideas to get you started:
Garlic Herb Butter: Infuse the vegan butter with roasted garlic and fresh herbs like rosemary, thyme, or parsley. Add the roasted garlic and finely chopped herbs after blending, before refrigerating.
Cinnamon Sugar Butter: Add cinnamon and sugar to the blended mixture for a sweet and flavorful spread.
Spicy Chili Butter: Incorporate chili flakes or a dash of cayenne pepper for a kick.
Lemon Zest Butter: Add lemon zest for a bright and citrusy flavor.
When experimenting with flavors, start with small amounts and taste as you go. You can always add more, but you can’t take it away!
Pro Tips & Troubleshooting
Pro Tips
- Use high-quality ingredients for the best flavor.
- Melt the coconut oil completely before blending for a smoother texture.
- Blend until the mixture is completely smooth and emulsified. Don’t rush the process.
- For a softer butter, adjust the ratio of coconut oil to canola oil. Use more canola oil for a softer consistency.
- Chill the butter in the refrigerator until completely solid before using.
- If the butter is too hard, let it sit at room temperature for a few minutes to soften.
- Don’t skip the sunflower lecithin! It’s essential for a smooth, stable texture.
Common Mistakes to Avoid
- Using unrefined coconut oil, resulting in a strong coconut flavor.
- Over-blending olive oil, causing bitterness (if using).
- Adding too much turmeric, resulting in an artificial yellow color.
- Not blending the mixture long enough, resulting in a grainy texture.
- Not allowing the butter to chill completely, resulting in a soft consistency.
Serving & Storage
Serving Ideas
- Spread on toast, bagels, or muffins.
- Use in vegan baking recipes as a 1:1 substitute for dairy butter.
- Melt over vegetables or pasta.
- Use for sautéing or frying.
- Make garlic bread or herb butter.
- Speaking of herbs, consider making a batch of vegan basil pesto to complement your garlic bread.
- Whip with powdered sugar for a frosting.
- Pair with cornbread for a classic Southern combination.
Storage and Make-Ahead
Store the vegan butter in an airtight container in the refrigerator for up to 7 days.
For longer storage, freeze the butter in individual portions or in a larger block.
Thaw frozen butter in the refrigerator overnight before using.
The shelf life of your homemade vegan butter depends on the ingredients used. Generally, it will last for about a week in the refrigerator. Freezing can extend its life to a few months.
Conclusion
This homemade vegan butter is easy to make, delicious, and perfect for anyone looking for a dairy-free alternative. The addition of sunflower lecithin ensures a smooth, creamy, and spreadable texture that rivals traditional dairy butter. Even if you’ve never made butter before, this recipe is simple and straightforward. Follow the instructions carefully, and you’ll have a batch of delicious vegan butter in no time. Experiment with different flavors and serving ideas to create your own signature vegan butter. Print this recipe and share it with your friends!
If you’re looking for other dairy-free alternatives, why not try making your own cashew cream? It’s another versatile recipe that can be used in sweet and savory dishes!
FAQ
Here are some frequently asked questions about making and using vegan butter:
Why make your own vegan butter when you can buy it?
Homemade vegan butter allows you to control the ingredients and avoid unwanted additives. It’s also often more affordable and tastes better!
How is this vegan butter best used?
This vegan butter can be used in the same way as dairy butter – for spreading, baking, cooking, and more.
How long will this vegan butter last?
When stored properly in the refrigerator, this vegan butter will last for up to 7 days. Freezing extends the shelf life significantly.
How should this vegan butter be stored?
Store the butter in an airtight container in the refrigerator.
What if I want a softer, more spreadable vegan butter?
Adjust the ratio of coconut oil to canola oil. Using more canola oil will result in a softer butter.
What substitutions can I make to the ingredients?
You can substitute almond milk for soy milk, avocado oil or olive oil for canola oil, and adjust the flavorings to your liking.
Can I freeze this vegan butter?
Yes, this vegan butter freezes well. Store it in an airtight container or freezer bag for up to 2 months.
What is the nutritional yeast for?
Nutritional yeast adds a cheesy, savory flavor to the butter, mimicking the taste of dairy butter.
Easy Homemade Vegan Butter Recipe (Dairy-Free!)
Ingredients
Equipment
Method
- Add the melted refined coconut oil to the blender jug along with the canola oil.
- Add the apple cider vinegar to the unsweetened soy or almond milk and stir it in. Allow it to sit for a minute or two, so that it curdles into buttermilk. Add the buttermilk to the blender.
- Add the nutritional yeast, a small pinch of turmeric, salt, and sunflower lecithin to the blender.
- Blend the mixture very well until it is completely smooth. This may take 2-3 minutes. Listen to the sound of the blender change as the mixture emulsifies, and watch the texture transform into a smooth, creamy consistency.
- Pour the mixture out into a butter dish and refrigerate until it’s completely set.
- Remove from the fridge to thaw for a few minutes if using on fresh bread or creaming with sugar for baking. Enjoy your delicious homemade vegan butter!
Notes
Lia Monet is a food blogger, recipe developer, and the founder of EasyAsMeals, a food blog focused on easy recipes, quick dinners, and everyday home cooking. She creates tested, family-friendly recipes using simple ingredients to help busy families cook affordable and delicious meals at home.