Finding a reliable Gluten-Free Pizza Crust that does not taste like cardboard is a rite of passage for every home baker. I have spent years in my kitchen testing ratios and techniques to finally land on a method that delivers that elusive combination of a crispy bottom and a chewy, airy center. This recipe is designed specifically for home cooks in the US who want a celiac-safe alternative to delivery pizza without sacrificing the authentic experience of a classic pizzeria slice.
Why You’ll Love This Recipe
The true magic of this crust lies in my unique twist: brushing the parbaked dough with a roasted garlic-infused herb oil before adding your sauce and toppings. This simple step transforms the flavor profile entirely.
Scientific logic dictates that when you brush the parbaked crust with oil, it penetrates the open pores of the gluten-free dough. During the final bake, this oil helps toast the crust from the inside out, ensuring it is as aromatic as traditional wheat pizza. The result is a texture that boasts crispy edges, a chewy interior, and a professional-grade structure that holds up to plenty of toppings. Because of the parbaking process, this recipe is also incredibly meal-prep friendly, allowing you to stock your freezer with crusts ready for a quick weeknight dinner, much like my quick and easy 30-minute meals.
Ingredients Needed

3 cups all purpose gluten free flour blend (plus more for sprinkling)
3 teaspoons xanthan gum (omit if your blend already contains it)
1 tablespoon instant yeast
1 1/2 teaspoons granulated sugar
1 1/2 teaspoons kosher salt
1 1/8 cups warm water (about 95°F)
4.5 tablespoons extra-virgin olive oil (plus more for brushing)
Your favorite pizza toppings
Ingredient Notes & Substitutions
The structure of gluten-free dough relies heavily on xanthan gum to mimic the elasticity of gluten. If your all-purpose gluten-free flour blend, such as King Arthur or Cup4Cup, already contains xanthan gum, you should omit it to avoid a gummy texture. Instant yeast is essential here for a rapid, reliable rise, while the flour blend provides the necessary starch foundation. While some bakers use Expandex or modified tapioca starch for extra stretch, it is not strictly required. Please avoid using plain almond flour as a direct substitute, as it lacks the starch content needed to hold the crust together.
How to Make Gluten-Free Pizza Crust
Mixing and Aeration
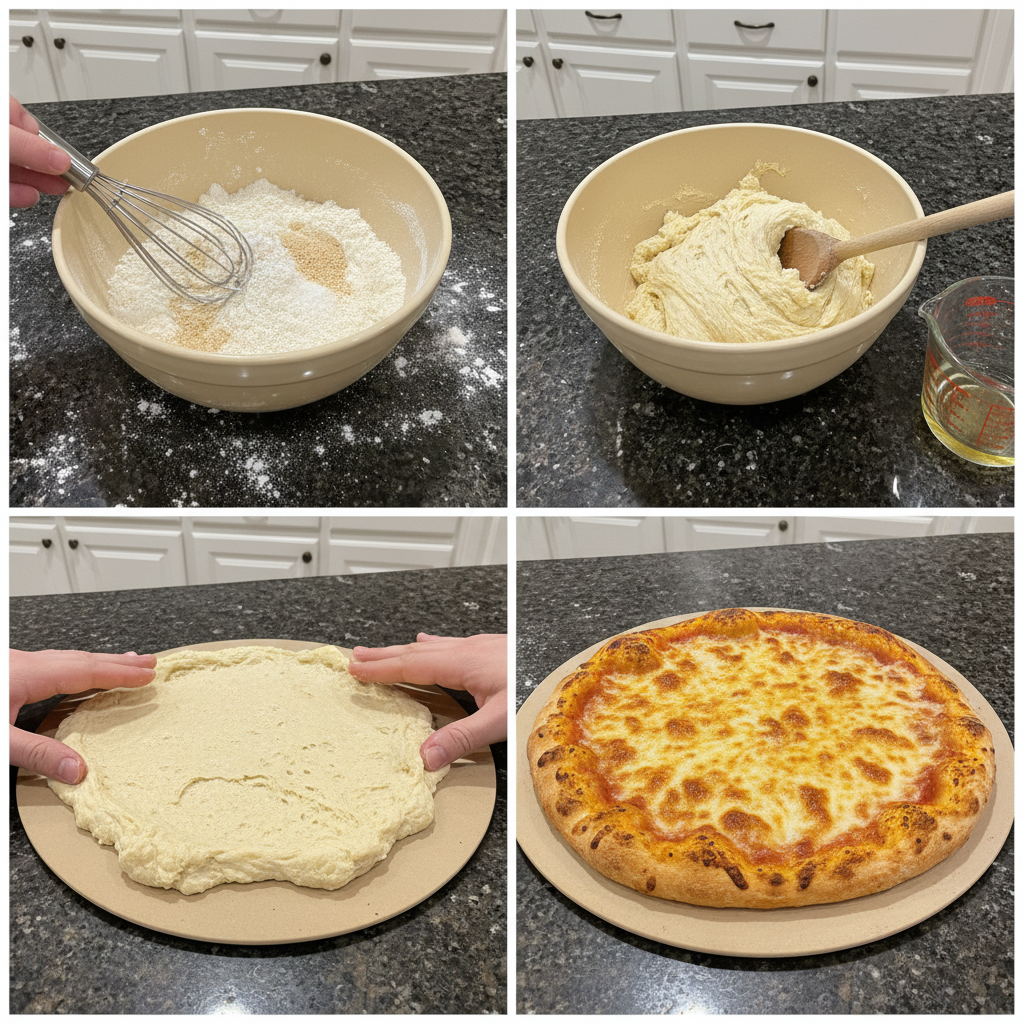
In the bowl of your stand mixer fitted with the paddle attachment or your food processor fitted with the plastic blade, place the flour, xanthan gum, yeast, and sugar, and whisk to combine with a separate, handheld whisk. Add the salt, and whisk again to combine well. Add the water and olive oil, and mix on medium speed in your stand mixer or pulse in your food processor until the dough begins to come together. Turn the mixer to high speed or your food processor on and process until the dough is no longer a ball but has begun to appear whipped for about 3 minutes. This process adds air to the dough, which is crucial for achieving an impressive oven spring and a light, manageable texture.
Rising and Chilling
Transfer the dough to an oiled container with a tight-fitting lid or a greased bowl, spray lightly with cooking oil spray, and cover tightly. Place in a warm, draft-free area to rise until it is about 150% of its original volume, which takes about an hour. Alternatively, you can refrigerate the dough for up to 3 days to develop flavor. If you have refrigerated the dough, work with it straight from the refrigerator, as the chill makes the dough much easier to handle and shape without excessive sticking.
Shaping and Parbaking
Place the dough on a lightly floured surface and sprinkle the top lightly with a bit more flour. Knead the dough gently until it is smoother and not sticky, then divide it into two equal portions. Cover the unused portion so it does not dry out. With floured fingers, roll the first piece of dough into a ball and then press it into a disk. Begin pressing the dough from the center toward the edges with floured fingers to create a disk with a raised edge. Continue pressing the dough toward the edge until you have about a 10-inch round, moving the dough frequently and using more flour as necessary.
Place a large piece of unbleached parchment paper onto the pizza peel or cutting board. Lift the dough gently onto the paper, and use a small rolling pin or pizza roller to smooth out the dough where there are uneven marks from your fingers until it is 11- to 12-inches in diameter. Use a pastry brush or your fingers to paint the top of the dough with olive oil, making sure to coat the edges generously. Transfer the dough to the preheated pizza stone or baking sheet in the oven and bake the dough plain for 5 to 7 minutes, or until the crust has begun to crisp on the underside.
The Final Bake
Remove the crust from the oven. At this stage, you may add your favorite toppings and return the pizza to the hot oven until the cheese is melted and the edges have browned and puffed, which takes another 5 to 7 minutes. Remove the pizza from the oven and allow it to set for 5 minutes before slicing and serving. This resting period is vital to ensure the crust maintains its structure when sliced.
Mastering Your Oven: Stones, Steels, and Heat
The equipment you use significantly impacts the final result. A baking steel provides intense, conductive heat that yields a very crisp bottom, whereas a pizza stone is more forgiving and draws moisture away from the dough effectively. If you are using a convection fan setting, I recommend lowering your oven temperature by 25°F or shortening the parbake time to prevent the crust from drying out before the toppings are cooked. If your oven runs hot, keep a close eye on the crust during the final two minutes of the parbake. For those who love pairing pizza with sides, try serving this with crispy air fryer zucchini fries.
Pro Tips & Troubleshooting
Pro Tips
Always use a kitchen scale to measure your flour; volume measurements can lead to a dry, crumbly crust if you accidentally scoop too much. A stand mixer is highly recommended over hand mixing to ensure you achieve that whipped, aerated consistency. Ensure your water is around 95°F to perfectly activate the yeast without damaging it. Finally, using parchment paper is the secret to transferring delicate gluten-free dough to the hot stone without tearing it.
Common Mistakes to Avoid
Avoid over-measuring your flour by volume, as this is the most common reason for a dense, dry crust. Do not skip the parbake, as this is the primary step that ensures your crust will not be soggy. Do not try to knead the dough like traditional bread dough; the consistency should remain closer to a thick, whipped batter.
Serving & Storage
Serving Ideas
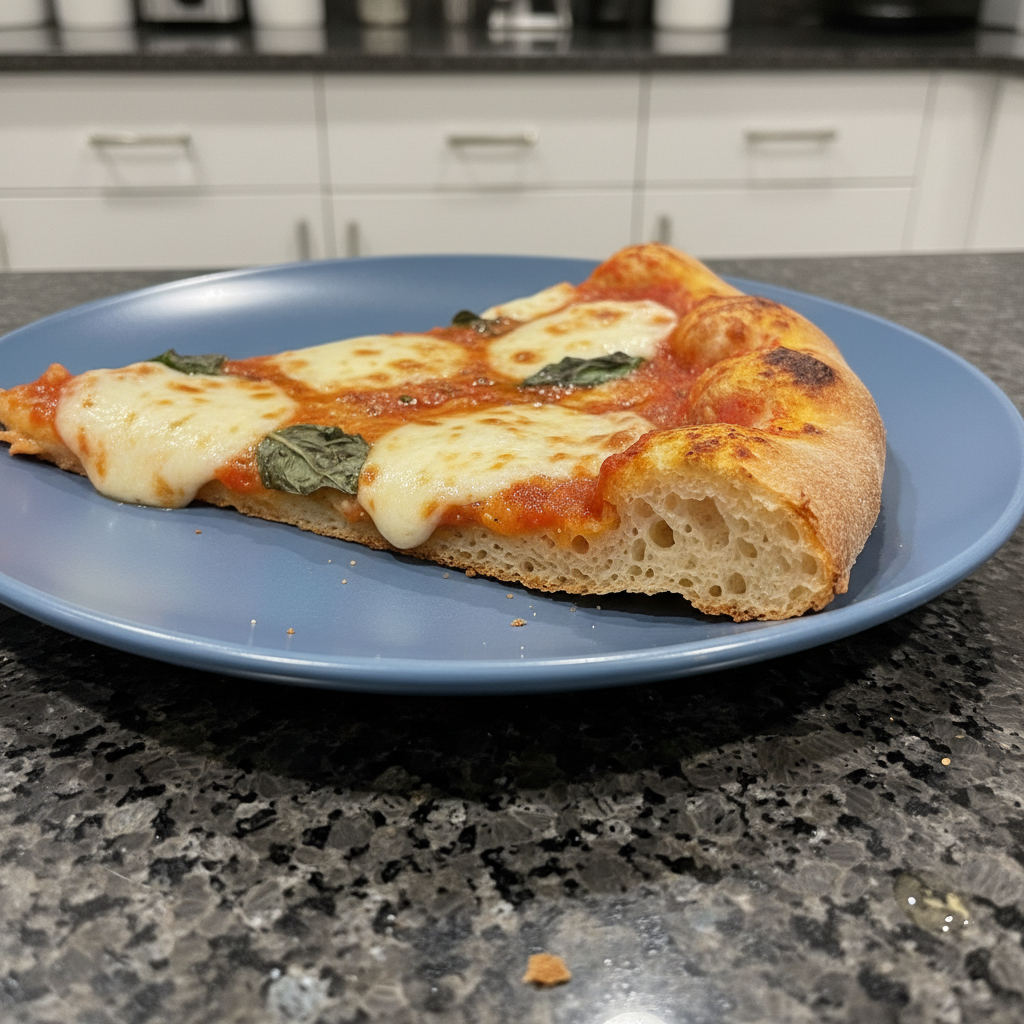
I love serving this pizza with a side of warm garlic butter for dipping the crispy edges. For toppings, a traditional Margherita with fresh basil and mozzarella is always a winner, though this crust holds up beautifully to heavier toppings like roasted vegetables or sausage.
Storage and Make-Ahead
You can freeze the parbaked crusts by cooling them completely, wrapping them tightly in plastic wrap and foil, and storing them for up to one month. Simply defrost at room temperature before adding your toppings and finishing the bake. Leftovers can be crisped back up in an air fryer at 350°F for 3 to 4 minutes.
Conclusion
This recipe bridges the gap between gluten-free necessity and artisan quality. By utilizing the stand mixer to build structure and the garlic-oil parbake method to build flavor, you can consistently achieve a crust that everyone at the table will enjoy. Whether you are a long-time gluten-free baker or a beginner, this method removes the guesswork and brings the joy of homemade pizza back to your kitchen. Be sure to check out my other cozy Saturday recipes for more gluten-friendly comfort food ideas.
FAQ
Is it possible to make gluten-free pizza dough by hand?
While you can mix it by hand, a stand mixer is superior because it effectively aerates the dough. This aeration is what gives gluten-free crusts their light, airy structure rather than a dense, heavy crumb.
What should I do if my gluten-free crust turns out crumbly?
Crumbly crusts are usually caused by using too much flour or not enough hydration. Ensure you are weighing your ingredients and that your water temperature is correct.
Do I need a pizza stone to get a crispy gluten-free crust?
A stone is ideal, but an overturned, heavy rimmed baking sheet works as an excellent alternative. It provides a flat, hot surface to help crisp the bottom of the crust.
Can I freeze the pizza dough before baking it?
It is best to freeze the crust after it has been parbaked. Freezing raw gluten-free dough often leads to poor texture and difficulty when shaping after thawing.
How can I make my gluten-free pizza crust chewier?
Adding a binder like Expandex or psyllium husk to your flour blend can increase the elasticity and chewiness of the final crust.
Do I need a second rise after shaping the dough?
No, because the dough is meant to be parbaked to set the structure, a second rise is not necessary and can actually cause the crust to lose its shape.
Best Gluten-Free Pizza Crust
Ingredients
Equipment
Method
- In the bowl of your stand mixer fitted with the paddle attachment or your food processor, whisk together the flour, xanthan gum, yeast, and sugar. Add the salt and whisk again to combine well.
- Add the water and olive oil. Mix on medium speed or pulse in the food processor until the dough begins to come together. Increase to high speed and process for about 3 minutes until the dough appears whipped and aerated.
- Transfer the dough to an oiled container or greased bowl. Spray the top lightly with cooking oil and cover tightly. Let it rise in a warm area until it reaches 150% of its original volume, roughly one hour. Alternatively, refrigerate for up to 3 days to develop flavor.
- Place the dough on a lightly floured surface. Knead gently until smooth and no longer sticky. Divide the dough into two equal portions and cover the portion you aren't using.
- Roll the dough into a ball and press into a disk. Using floured fingers, press from the center toward the edges to create a 10-inch round with a raised edge. Transfer the dough to a piece of parchment paper and use a rolling pin to smooth it out to 11-12 inches.
- Brush the top and edges generously with olive oil. Transfer to a preheated pizza stone or baking sheet and parbake for 5 to 7 minutes until the underside starts to crisp.
- Remove the crust from the oven and add your favorite toppings. Return to the oven for 5 to 7 minutes until the cheese is melted and the edges have browned and puffed.
- Allow the pizza to rest for 5 minutes before slicing. This helps the crust maintain its structure.
Notes
Lia Monet is a food blogger, recipe developer, and the founder of EasyAsMeals, a food blog focused on easy recipes, quick dinners, and everyday home cooking. She creates tested, family-friendly recipes using simple ingredients to help busy families cook affordable and delicious meals at home.