Introduction
There is nothing that screams classic American summer like the perfect slice of strawberry shortcake. Forget the crumbly, dry biscuit versions you might have encountered. Today, we are elevating this classic dessert to true Bakery Style Strawberry Shortcake status. This version utilizes a tender, moist Vanilla Cake layered high with luscious cream and glistening Fresh Strawberries. I have a secret weapon in my recipe, a small addition that professional bakers swear by, which ensures your shortcake tastes bright, fresh, and utterly superior. Get ready to bake a cake that tastes like it came straight from a high-end pastry shop.
Why You’ll Love This Strawberry Shortcake Recipe (The Secret Twist)
This recipe takes a familiar dessert and perfects the balance of rich flavor and bright acidity. It’s designed for texture and stability, ensuring a show-stopping result.
The Unique Twist is the addition of 1/4 teaspoon of finely grated lemon zest directly into the heavy whipping cream before whipping. This step transforms the frosting experience.
The Science behind this is simple yet profound. Lemon zest contains highly concentrated essential oils that possess a natural ability to cut through richness. This zest brightens the entire flavor profile, preventing the cake and cream from tasting too heavy or overly sweet.
Benefits include a remarkably moist crumb, thanks to our intentional combination of butter and Vegetable Oil in the cake batter. Furthermore, the addition of the zest helps stabilize the Stabilized Whipped Cream, making it less likely to weep or collapse during assembly.
Ingredients Needed
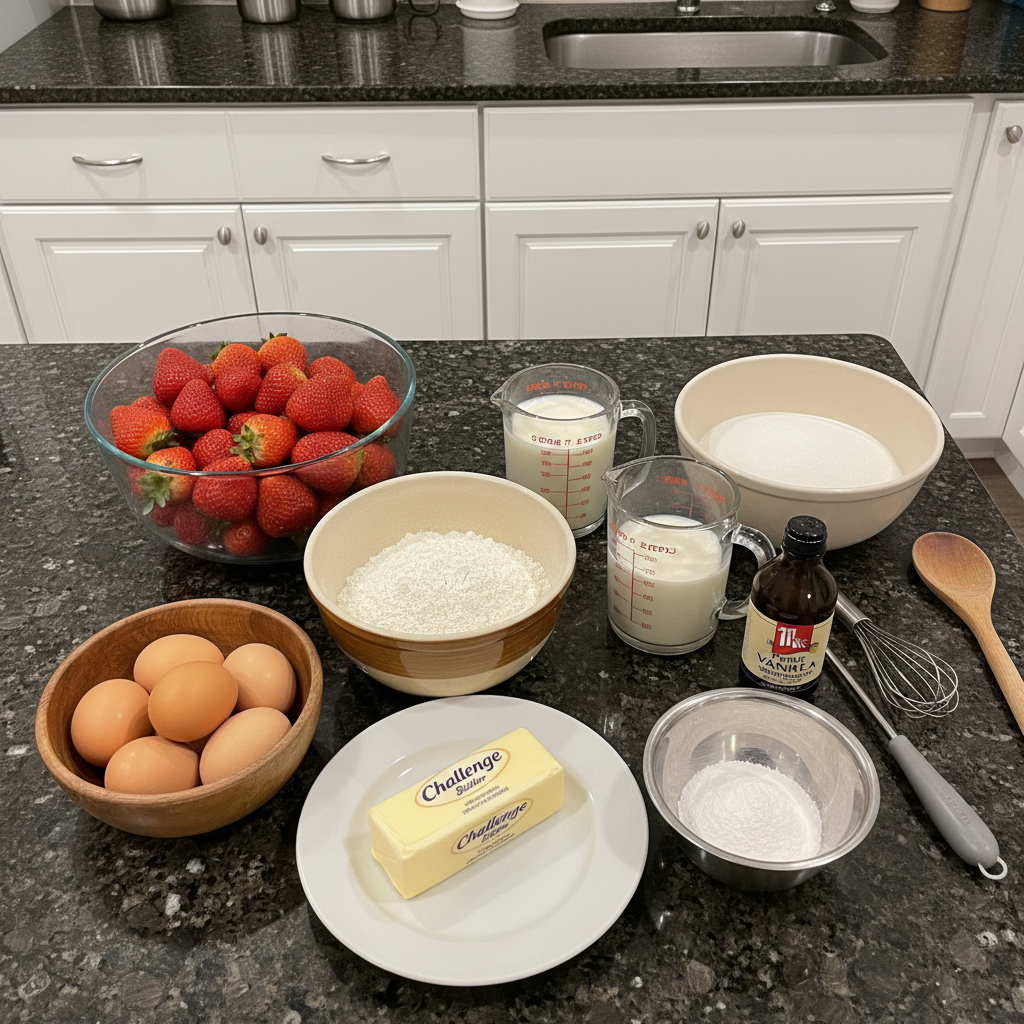
For the Vanilla Cake Layers
- 2 1/2 cups (325g) all-purpose flour (measured properly)
- 2 1/2 tsp baking powder
- 1/2 tsp salt
- 1/2 cup (112g) unsalted Challenge butter, room temperature
- 1/2 cup (120ml) vegetable oil
- 1 1/2 cups (310g) sugar
- 1 tbsp vanilla extract
- 4 large eggs
- 1 1/4 cups (300ml) milk
For the Macerated Strawberries
- 1 pound fresh strawberries
- 3 tbsp (39g) sugar
For the Stabilized Whipped Cream
- 2 1/2 cups (600ml) heavy whipping cream, cold
- 1 1/4 cups (144g) powdered sugar
- 2 tsp vanilla extract
Ingredient Notes & Substitutions
Flour: For the best, lightest crumb, always measure your All-purpose flour using the ‘spoon and level’ method. Do not scoop directly from the bag, as this packs the flour down and results in a dry cake.
Butter & Oil: We use both! The Room temperature butter provides the essential flavor foundation through the creaming method, while the Vegetable Oil guarantees the cake stays incredibly moist, even overnight in the refrigerator.
Strawberries: Aim for bright red, perfectly ripe strawberries for the best flavor payoff. While this recipe is designed for fresh fruit, a 1:1 gluten-free flour blend can successfully substitute the All-purpose flour for a GF version.
How to Make Bakery Style Strawberry Shortcake
Preparation and Creaming Stage
Prepare three 9 inch cake pans with parchment paper circles in the bottom and grease the sides. Preheat oven to 350°F (176°C).
Combine the flour, Baking Powder and salt in a medium sized bowl and set aside. The leavening action from baking powder relies on this combination of dry ingredients activating correctly with the liquid in your batter.
Add the butter, oil, sugar and vanilla extract to and large mixer bowl and beat together until light in color and fluffy, about 2 minutes. Do not skimp on the creaming time. You should visibly see a change in color and texture. This step is crucial for aeration.
Batter Assembly and Baking
Add the eggs one at a time, mixing until mostly combined after each. Scrape down the sides of the bowl as needed to be sure all ingredients are well incorporated.
Add half of the dry ingredients to the batter and mix until mostly combined.
Slowly add the milk and mix until well combined.
Add the remaining dry ingredients and mix until well combined and smooth. Scrape down the sides of the bowl as needed to be sure all ingredients are well incorporated. Do not over mix the batter; over-mixing develops gluten leading to a tough cake.
Divide the batter evenly between the cakes pans and bake for 18-20 minutes, or until a toothpick comes out with a few moist crumbs.
Remove the cakes from the oven and allow to cool for about 2-3 minutes, then remove to cooling racks to cool completely.
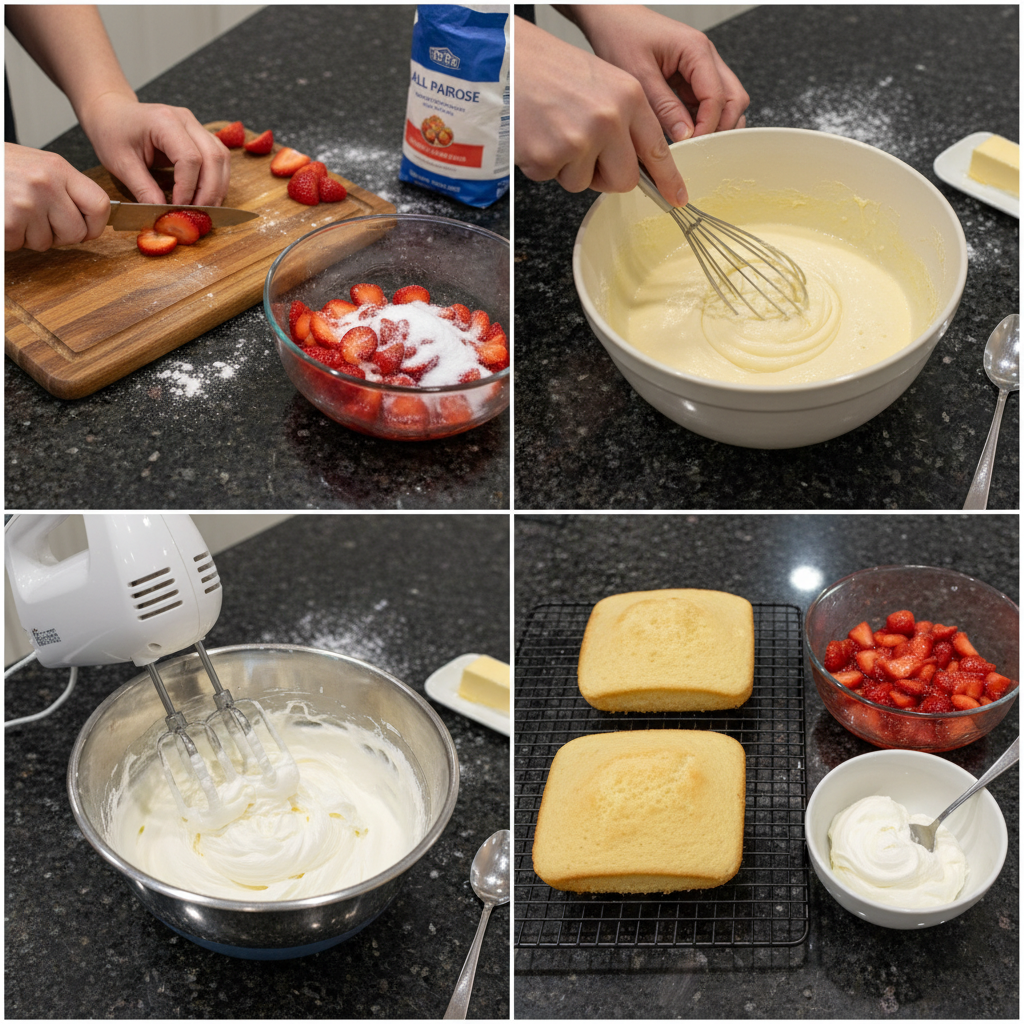
Preparing the Macerated Strawberries
Wash the strawberries, cut the stems off, and slice them.
Add the sliced strawberries and sugar to a large bowl and toss together. Set in the fridge for at least 1-2 hours to let the sugar bring out the juices from the berries. The longer it sits, the more juices you’ll have.
Creating the Stabilized Whipped Cream
This is where the magic happens. Add the heavy whipping cream, powdered sugar and vanilla extract to a large mixer bowl and whip on high speed until medium to stiff peaks form. Remember to add that 1/4 teaspoon of lemon zest now for that bright note.
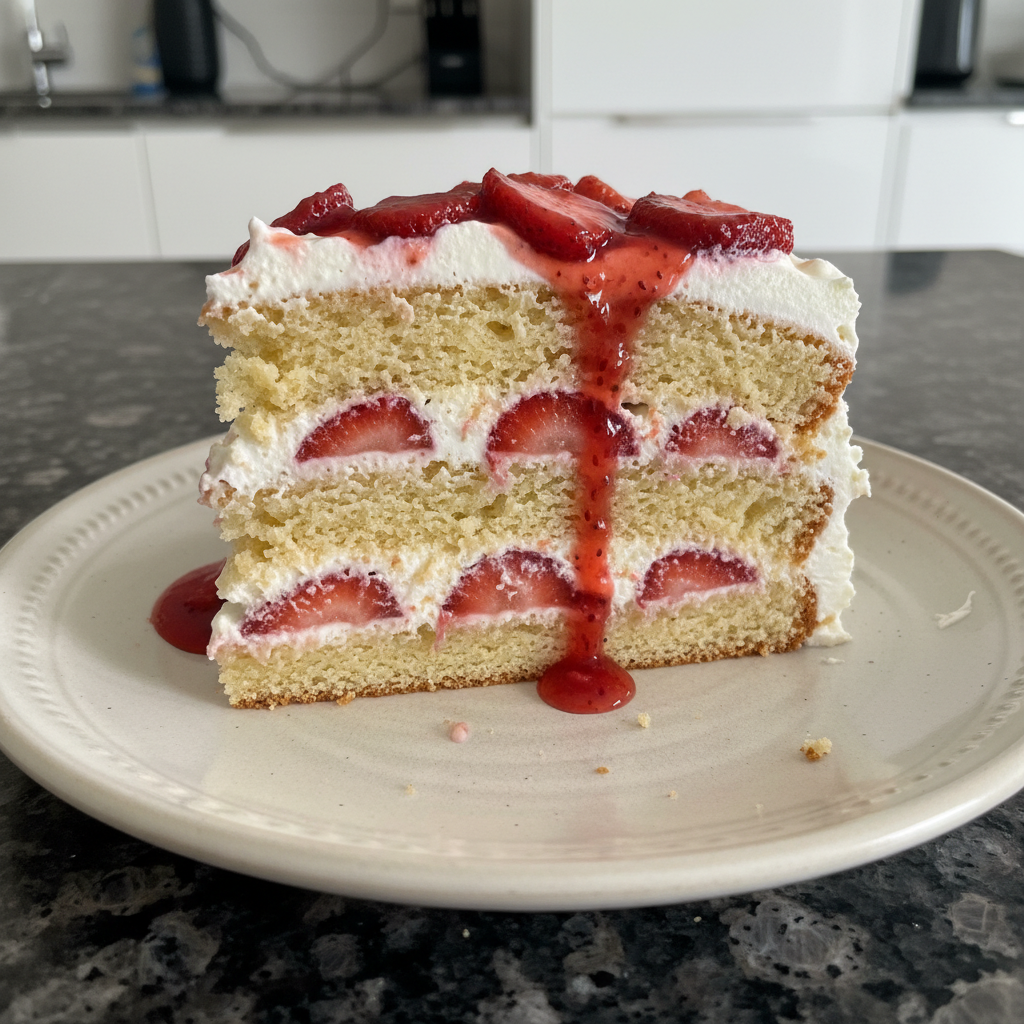
Layering and Assembly
Place the first cake layer on a cake plate or other serving platter. Add a layer of whipped cream. I used Ateco tip 808 to pipe dallops around the outer edge of the cake, then filled it in. You could also just spread a layer of whipped cream.
Add about half of the strawberries on top of the whipped cream.
Add the second layer of cake, another layer of whipped cream and another layer of strawberries.
Add the final layer of cake, then finish it off with some whipped cream swirls and fresh strawberries. If you have any leftover juices from the sliced strawberries, you could also drizzle that on top or serve it with the cake slices.
Refrigerate the cake until ready to serve. The cake layers and strawberries can be made up to a day ahead, but the cake is best if layered together the day it’ll be served.
Master the Layers: Troubleshooting Batter & Finish
Solving the Three-Layer Batter Dilemma
When dividing the batter for three 9-inch cake pans, the resulting layers will naturally be thin, roughly one inch high. This is intentional for a classic Bakery Style Strawberry Shortcake stack where you prioritize height and multiple fruit/cream layers over thick sponges.
If you prefer two thicker layers, you can certainly use just two 9-inch cake pans. If you do this, you must extend your Baking time to approximately 25 to 30 minutes, checking frequently for doneness.
For the most accurate layer distribution, I strongly recommend using a kitchen scale to weigh the total batter and then divide that weight by three to ensure even layers.
Achieving a Professional Look Without Pastry Tips
You absolutely do not need specialized piping tips to achieve a beautiful finish. For home cooks without pastry bags, utilize the ‘Rustic Swoop’ technique.
Take the back of a large, smooth spoon or an offset spatula. Apply the Stabilized Whipped Cream to the top and sides of the cake. Instead of trying to create smooth sides, drag the utensil in gentle arcs or valleys across the surface. This creates beautiful texture that the strawberries and syrup can nestle into perfectly.
Pro Tips & Troubleshooting
Pro Tips for Success
- Use room temperature eggs and milk to prevent the batter from curdling during the addition phase, ensuring a smooth emulsion.
- Ensure the heavy cream is ice cold before whipping for maximum volume and stability.
- Drizzle the strawberry syrup directly onto the interior cake layers during assembly for maximum moisture infusion.
Common Mistakes to Avoid
- Over-mixing: This is the number one killer of tender cake. Mixing past the point where ingredients are just combined results in a ‘bready’ or tough texture instead of a fine cake crumb.
- Skimping on maceration time: One hour is the absolute minimum for the sugar to adequately draw out the juices necessary for that signature syrup.
- Using warm cake layers: If you try to assemble the cake while the layers are even slightly warm, the heavy whipping cream will melt instantly, causing the entire structure to slide apart.
Serving & Storage
Serving Ideas
Serve this shortcake slightly chilled. To enhance the lemon notes, try garnishing each slice with a small sprig of fresh mint. The brightness also pairs beautifully with a glass of dry sparkling Rosé.
Storage & Make-Ahead Guide
Fridge: The fully assembled cake lasts best for about 24 hours when kept in an airtight carrier. It is truly best enjoyed the day it is assembled.
Make-Ahead: You can bake the Vanilla Cake layers, wrap them tightly in plastic wrap, and keep them at room temperature for 24 hours or freeze them for up to one month. Remember to thaw completely before frosting.
Note: Do not macerate your strawberries more than four hours ahead of time, as they can become overly soft and mushy.
Conclusion
Achieving this stunning Bakery Style Strawberry Shortcake is all about respecting the process—the delicate balance of the creaming method, the moisture insurance from the oil, and that bright, unexpected lift from the lemon zest in the cream. Even if you skip the fancy piping and opt for my rustic swoop technique, the flavor profile here will absolutely stand out. I encourage you to try this recipe and taste the difference that precision makes in your summer baking. For more context on how oil contributes to cake moisture, you can review the general principles of why some cakes use oil instead of butter.
FAQ
Can I make this strawberry shortcake cake ahead of time?
Yes, but assemble shortly before serving for the best texture, especially regarding the crispness of the cake layers against the moist strawberries.
Why is my cake layer batter so thin for three 9-inch pans?
This thinness is intentional for achieving the desired height and multiple layers in a bakery style presentation. If your rise is poor, double-check the freshness and activation of your Baking Powder.
Can I use frozen strawberries instead of fresh?
I advise against using frozen strawberries for the macerated topping, as they release too much water and create a mushy texture. Frozen berries work well only if you intend to cook them into a sauce separately.
How do I frost this cake without using pastry tips?
Use the back of a large spoon or an offset spatula to create attractive swirls and valleys across the top and sides, giving the cake a beautiful, rustic texture.
What is the best way to store leftover strawberry shortcake cake?
Store any leftovers in an airtight container in the refrigerator for up to 2 days, though consumption within 24 hours is ideal.
What makes this vanilla cake so moist?
The high moisture content comes from the strategic combination of flavorful butter and the moisture retention properties of Vegetable Oil, which keeps the crumb soft even when chilled.
Bakery Style Strawberry Shortcake (With a Secret Zesty Twist)
Ingredients
Equipment
Method
- Prepare three 9 inch cake pans with parchment paper circles in the bottom and grease the sides. Preheat oven to 350°F (176°C).
- Combine the flour, baking powder, and salt in a medium-sized bowl and set aside.
- Add the butter, oil, sugar, and vanilla extract to a large mixer bowl and beat together until light in color and fluffy, about 2 minutes. Do not skimp on the creaming time.
- Add the eggs one at a time, mixing until mostly combined after each. Scrape down the sides of the bowl as needed.
- Add half of the dry ingredients to the batter and mix until mostly combined.
- Slowly add the milk and mix until well combined.
- Add the remaining dry ingredients and mix until well combined and smooth. Do not over mix the batter to ensure a tender crumb.
- Divide the batter evenly between the cakes pans and bake for 18-20 minutes, or until a toothpick comes out with a few moist crumbs.
- Remove cakes from the oven and allow to cool for 2-3 minutes, then remove to cooling racks to cool completely.
- Wash the strawberries, cut the stems off, and slice them.
- Add the sliced strawberries and sugar to a large bowl and toss together. Refrigerate for at least 1-2 hours to let the sugar draw out the juices.
- Add the cold heavy whipping cream, powdered sugar, vanilla extract, and 1/4 teaspoon of lemon zest to a large mixer bowl.
- Whip on high speed until medium to stiff peaks form.
- Place the first cake layer on a serving platter. Add a layer of whipped cream (piped with Ateco tip 808 or spread evenly).
- Add about half of the strawberries on top of the whipped cream.
- Add the final layer of cake, then finish with whipped cream swirls and fresh strawberries. Drizzle any leftover juice on top if desired.
- Refrigerate the cake until ready to serve. Best enjoyed the day it is assembled.