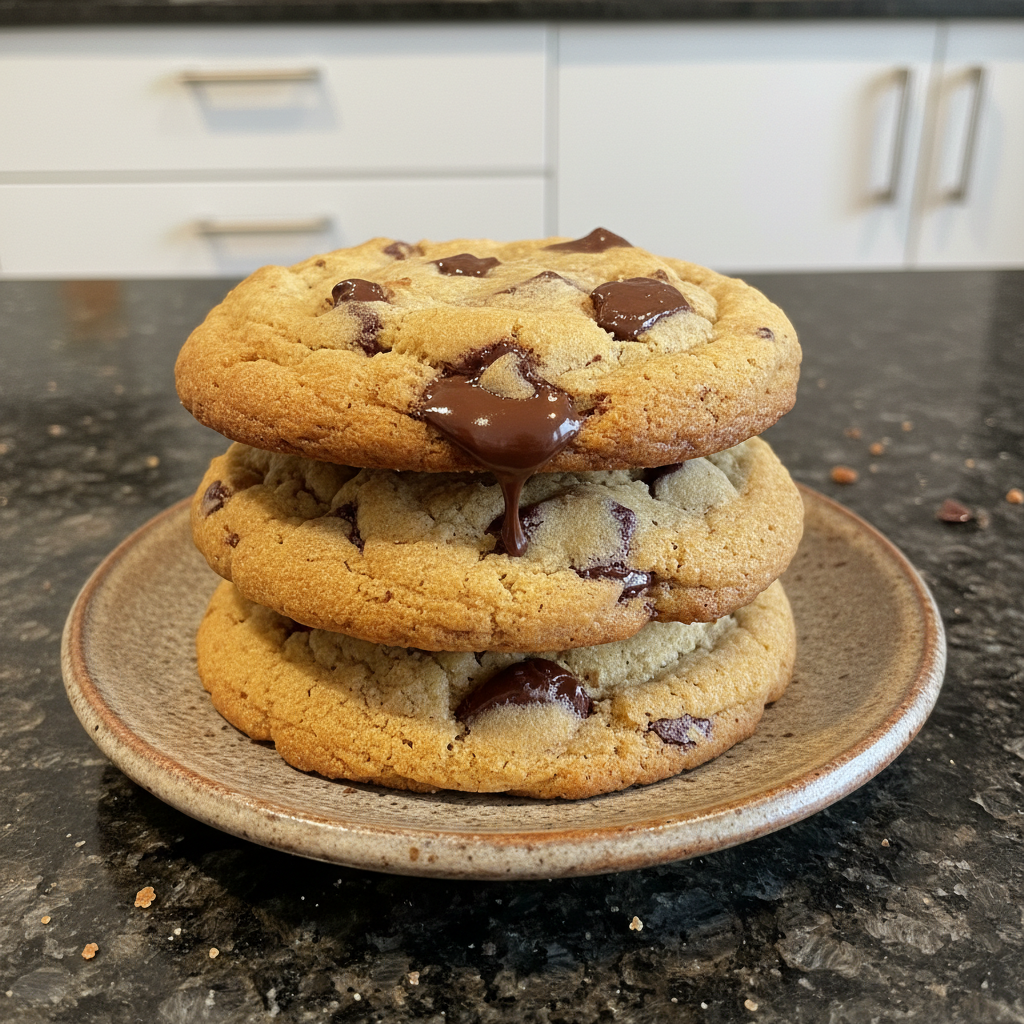
1. Introduction
There’s something truly magical about Chocolate Crinkle Cookies, especially when the holiday season rolls around. These delightful treats, with their fudgy centers and snowy powdered sugar coating, are always a crowd-pleaser. This recipe shows you how to make perfect Chocolate Crinkle Cookies, but with a special twist that takes them to a whole new level of deliciousness. You’ll learn all my secrets for achieving that signature crinkled look and that intensely chocolatey flavor. Get ready to bake the best chocolate crinkle cookies you’ve ever tasted!
2. Why You’ll Love This Chocolate Crinkle Cookies Recipe
This Chocolate Crinkle Cookies recipe stands out from the rest because of one key ingredient: browned butter. It transforms the flavor and texture in the best possible way. For more information, you can read about the science of browning butter and how it enhances flavor.
Enhanced flavor: Browning the butter gives it a nutty, caramel-like flavor that perfectly complements the rich chocolate.
Chewy and fudgy texture: The browned butter slightly solidifies as it cools, contributing to a wonderfully chewy and fudgy texture.
Perfect for gifting: These cookies are so delicious and festive, making them ideal for holiday baking and gifting.
3. Ingredients Needed
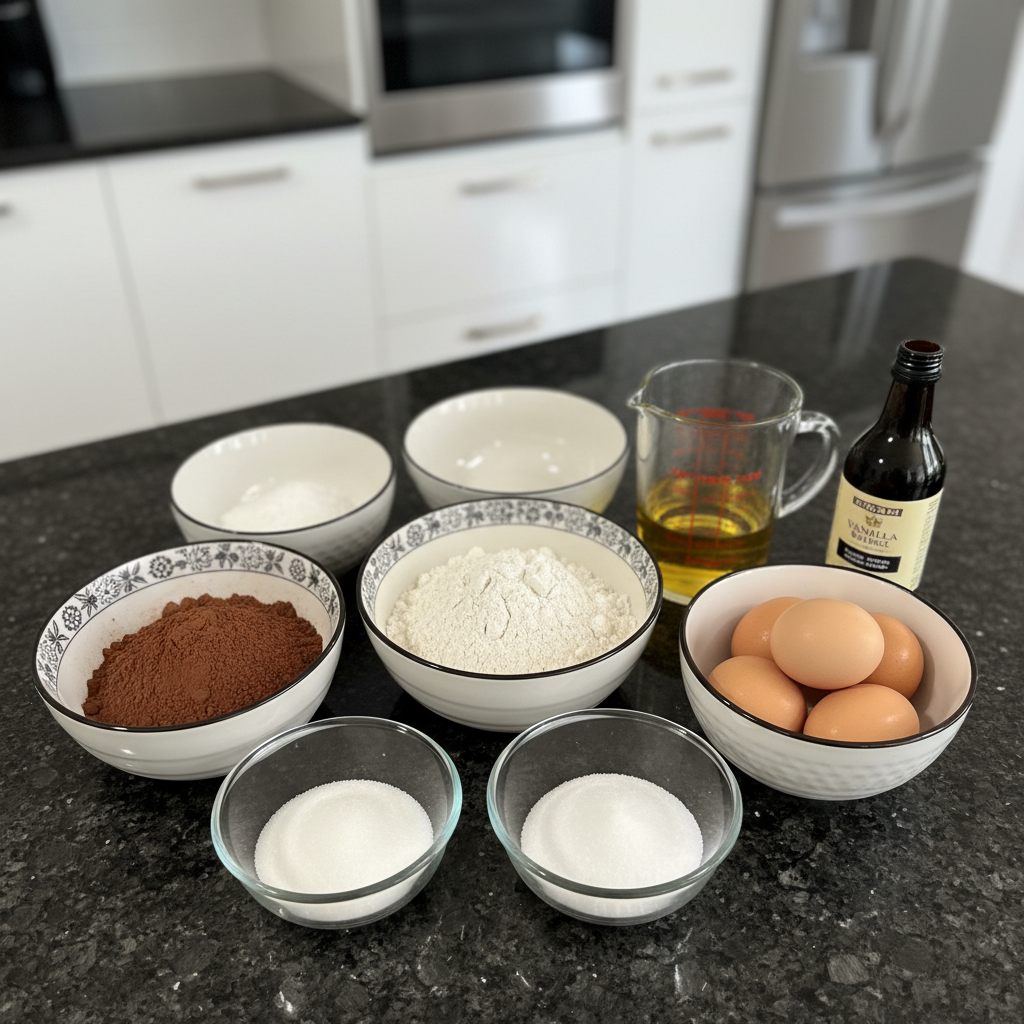
1 cup unsweetened cocoa powder (100g)
1¾ cups granulated sugar (350g)
½ cup vegetable oil (120mL)
4 large eggs (room temperature)
2 teaspoons vanilla extract
2 cups all-purpose flour (240g)
2 teaspoons baking powder
¾ teaspoon salt
1 cup powdered sugar (120g)
Ingredient Notes & Substitutions
Cocoa Powder: I highly recommend using a high-quality unsweetened cocoa powder for the best and most intense chocolate flavor. You can use either Dutch-processed or natural cocoa powder, but be aware that Dutch-processed cocoa will give a slightly milder flavor. More information on the difference between Dutch-processed and natural cocoa powder can help you choose the right one for your taste.
Fat/Oil Alternatives: The star of this recipe is the browned butter (used in place of vegetable oil), which adds a depth of flavor you won’t get otherwise. If you’re in a pinch, you can use melted coconut oil or another neutral oil, but the flavor won’t be quite the same.
Flour types: For those with gluten sensitivities, you can try using a gluten-free all-purpose flour blend. Keep in mind that the texture might be slightly different.
Sugar types: While this recipe calls for granulated sugar, you can experiment with a mix of white and brown sugar for a deeper, more molasses-like flavor.
4. How to Make Chocolate Crinkle Cookies
These cookies are surprisingly easy to make, even with the browned butter!
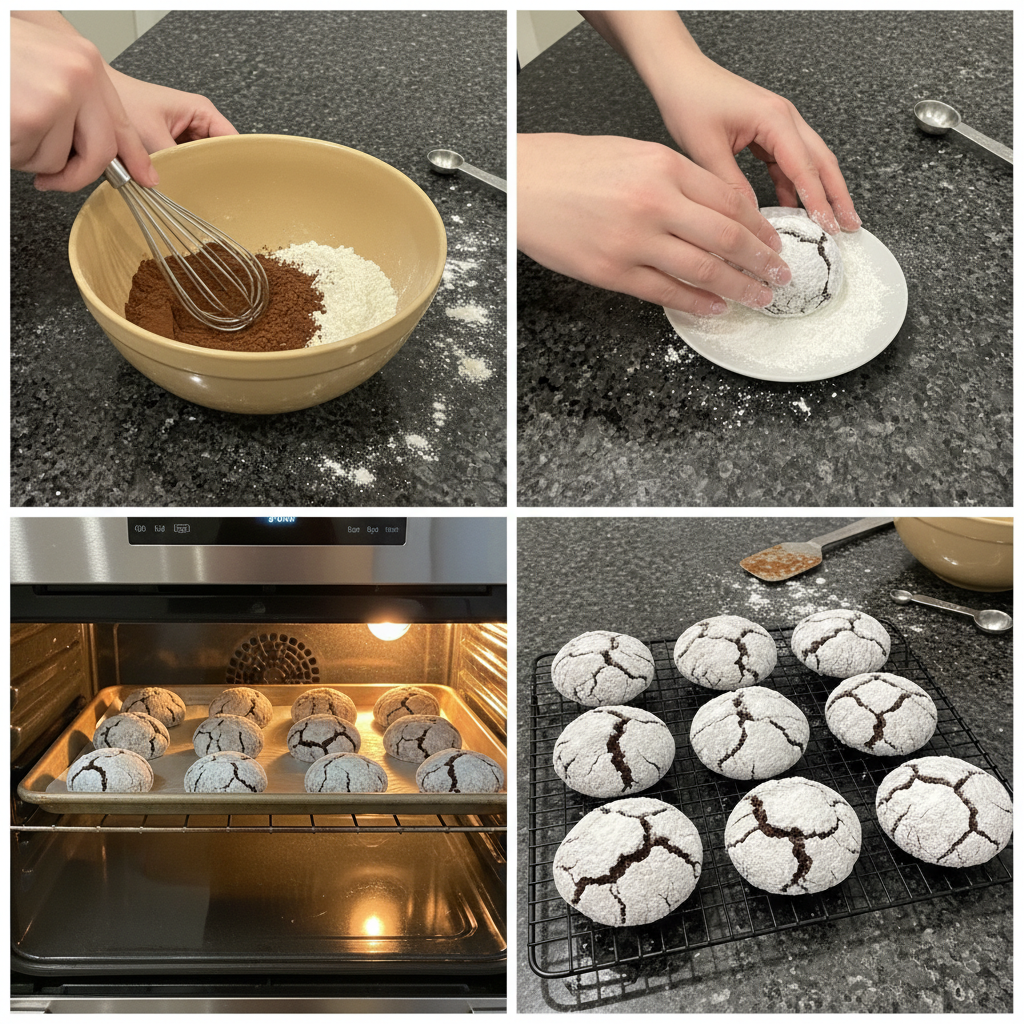
Step 1: Combine Sugar, Cocoa Powder, and Oil
In a large mixing bowl using a hand mixer or the bowl of a stand mixer fitted with the paddle attachment, combine the sugar, cocoa powder, and oil (or cooled, slightly solidified browned butter). Beat on medium speed until well combined and the mixture looks shiny and smooth.
Step 2: Add Eggs and Vanilla
Add the eggs one at a time, beating until well combined after each addition. Room-temperature eggs emulsify better, resulting in a smoother batter. Beat in the vanilla extract.
Step 3: Combine Dry Ingredients
In a medium bowl, combine the flour, baking powder, and salt, stirring to combine. Add the flour mixture to the cocoa mixture and mix on low speed just until combined. Be careful not to overmix, as this can lead to tough cookies.
Step 4: Chill the Dough
Cover the dough in plastic wrap and refrigerate for at least 4 hours or up to overnight. Chilling is crucial for preventing the cookies from spreading too thin and for developing the flavor.
Step 5: Preheat Oven and Prepare Baking Sheets
Once the dough has chilled, preheat oven to 350°F. Line two large baking sheets with parchment paper. This prevents sticking and makes cleanup easier.
Step 6: Scoop and Roll Dough Balls in Powdered Sugar
Place the powdered sugar in a small bowl. Using a small ice cream scoop or tablespoon, scoop the chilled dough and roll it into roughly one-inch balls. Roll the dough balls in powdered sugar until well coated and place them on the prepared baking sheet about 2 inches apart. Only coat as many dough balls as you can fit on the baking sheets at one time. Refrigerate the remaining dough balls and roll in powdered sugar just before baking to prevent the sugar from dissolving.
Step 7: Bake
Bake for 10 to 12 minutes or until the edges of the cookies are firm and the center is puffed but still appears slightly wet.
Step 8: Cool
Let them cool on the baking sheets for a few minutes then transfer to a wire rack to cool completely.
5. The Science of Chilling and Cracking
Understanding the science behind this recipe will help you achieve perfect cookies every time.
Why Chilling is Crucial
Chilling the dough is not just a suggestion; it’s essential. The cold temperature solidifies the butter (or oil), which prevents the cookies from spreading too much during baking. It also allows the gluten in the flour to relax, resulting in a more tender cookie. In fact, longer chilling times, up to 24 hours, can actually enhance the flavor!
The Maillard Reaction and Cracking
The signature cracks in Chocolate Crinkle Cookies are a result of the Maillard reaction, a chemical process that occurs when sugars and amino acids are heated. This browning process creates those beautiful fissures. The contrast between the dark cookie and the white powdered sugar makes the cracks even more visible and appealing.
6. Pro Tips & Troubleshooting
Here are some extra tips and tricks to help you bake the best Chocolate Crinkle Cookies:
Pro Tips
For an extra crisp sugar coating, roll the dough balls in granulated sugar first, then in powdered sugar.
To enhance the chocolate flavor, add 1 teaspoon of instant espresso powder to the sugar and butter mixture.
Use a cookie scoop for uniform size and even baking.
Ensure the browned butter has cooled and slightly solidified before mixing for the best texture.
Don’t skip the chilling step; it’s essential for the cookies to hold their shape.
Common Mistakes to Avoid
Rushing the chilling time. Adhere to the minimum of 4 hours.
Letting the dough sit out too long at room temperature after chilling, which can lead to flat cookies.
Overbaking the cookies. They should still be slightly soft in the center.
Coating all the dough balls in powdered sugar at once, as the sugar will dissolve.
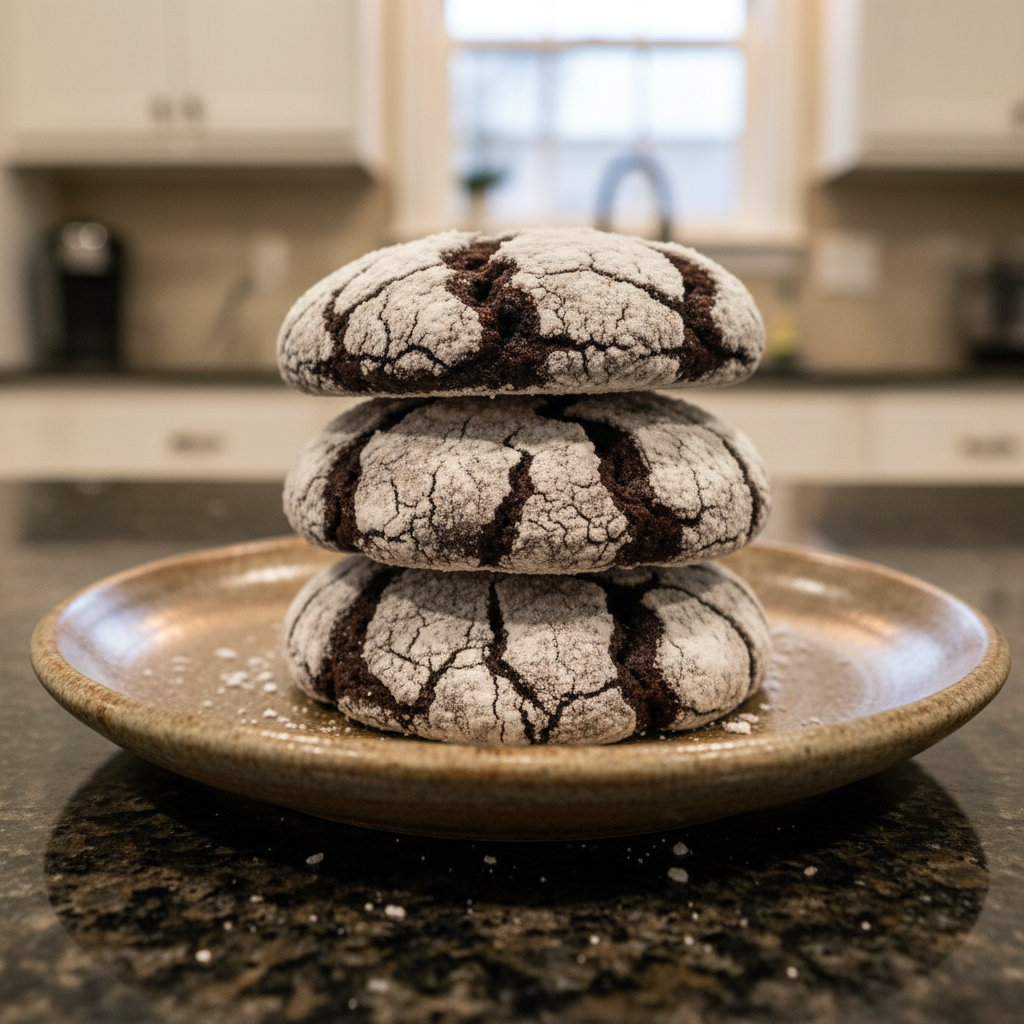
7. Serving & Storage
These cookies are perfect for any occasion!
Serving Ideas
Serve these festive treats at holiday parties or bake sales.
Add them to Santa’s cookie plate.
Pair with a glass of cold milk, hot cocoa, or coffee.
Stack them on a pretty plate or arrange them in a gift box. Speaking of sweet treats, you might also enjoy these strawberry pretzel salad for a different kind of dessert.
Stack them on a pretty plate or arrange them in a gift box.
Storage and Make-Ahead
Store baked cookies in an airtight container at room temperature for up to 3-4 days.
Freeze baked cookies for up to 2 months. Thaw at room temperature.
Make the dough ahead of time and store it in the refrigerator for up to 2 days.
Freeze the dough balls before coating in powdered sugar for longer storage (up to 3 months).
8. Conclusion
These Chocolate Crinkle Cookies are a delightful treat with a rich, fudgy texture and a festive appearance. With this easy-to-follow recipe, even beginners can achieve great results. The browned butter twist adds an extra layer of flavor that will impress everyone. Print this recipe and share it with your friends and family this holiday season! If you want to try another recipe, why not check out these gingerbread cheesecake bars?
9. FAQ
Here are some frequently asked questions about Chocolate Crinkle Cookies:
How do I know when the cookies are done baking?
The edges should be set, and the centers should be puffed but still slightly soft.
Why are my cookies flat?
The dough was not chilled long enough, or the butter was too warm. Make sure to chill the dough for at least 4 hours and ensure the browned butter is cooled before mixing.
Why didn’t my cookies crack?
The oven temperature might be too low, or the dough might be too dry. Ensure your oven is properly calibrated and that you are using the correct amount of liquid ingredients.
Can I freeze these cookies?
Yes, you can freeze both baked cookies and the dough. Store them in an airtight container for up to 2 months.
Can I make these ahead of time?
Yes, you can make the dough ahead of time and store it in the refrigerator for up to 2 days.
How to store chocolate crinkle cookies?
Store baked cookies in an airtight container at room temperature for up to 3-4 days.
Can you chill the dough longer than 24 hours?
Yes, you can chill the dough for up to 48 hours. After that, the dough might start to dry out.
Chocolate Crinkle Cookies Recipe with Brown Butter
Ingredients
Equipment
Method
- In a large mixing bowl using a hand mixer or the bowl of a stand mixer fitted with the paddle attachment, combine the sugar, cocoa powder, and oil (or cooled, slightly solidified browned butter). Beat on medium speed until well combined and the mixture looks shiny and smooth.
- Add the eggs one at a time, beating until well combined after each addition. Room-temperature eggs emulsify better, resulting in a smoother batter. Beat in the vanilla extract.
- In a medium bowl, combine the flour, baking powder, and salt, stirring to combine. Add the flour mixture to the cocoa mixture and mix on low speed just until combined. Be careful not to overmix, as this can lead to tough cookies.
- Cover the dough in plastic wrap and refrigerate for at least 4 hours or up to overnight. Chilling is crucial for preventing the cookies from spreading too thin and for developing the flavor.
- Once the dough has chilled, preheat oven to 350°F. Line two large baking sheets with parchment paper. This prevents sticking and makes cleanup easier.
- Place the powdered sugar in a small bowl. Using a small ice cream scoop or tablespoon, scoop the chilled dough and roll it into roughly one-inch balls. Roll the dough balls in powdered sugar until well coated and place them on the prepared baking sheet about 2 inches apart. Only coat as many dough balls as you can fit on the baking sheets at one time. Refrigerate the remaining dough balls and roll in powdered sugar just before baking to prevent the sugar from dissolving.
- Bake for 10 to 12 minutes or until the edges of the cookies are firm and the center is puffed but still appears slightly wet.
- Let them cool on the baking sheets for a few minutes then transfer to a wire rack to cool completely.
Notes
Lia Monet is a food blogger, recipe developer, and the founder of EasyAsMeals, a food blog focused on easy recipes, quick dinners, and everyday home cooking. She creates tested, family-friendly recipes using simple ingredients to help busy families cook affordable and delicious meals at home.