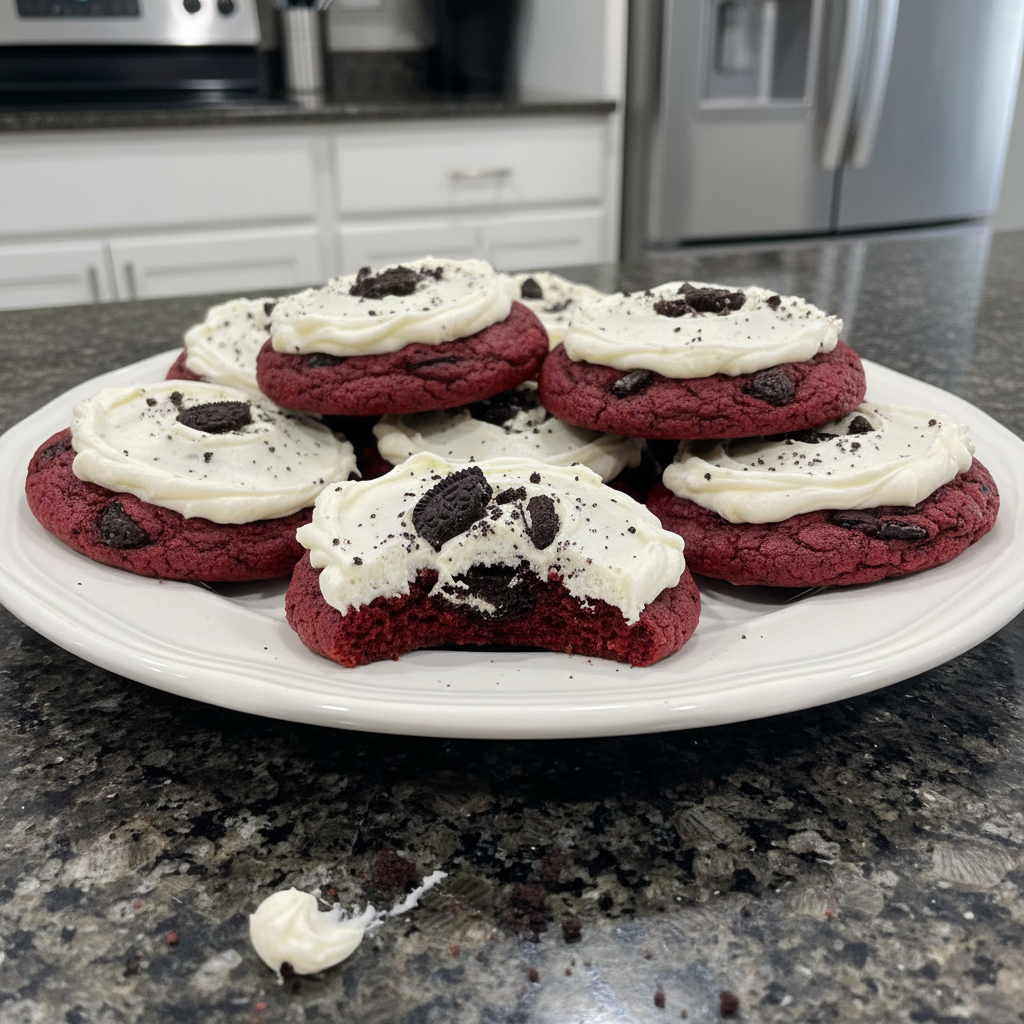
Is there anything more tempting than a red velvet treat? How about combining that classic flavor with the irresistible crunch of Oreo cookies? This recipe for Red Velvet Oreo Cookies brings together the best of both worlds. Get ready to bake up a batch of soft, tangy, and utterly delicious cookies that will disappear in minutes. You’ll learn how to make these amazing Red Velvet Oreo Cookies from scratch with a special ingredient that elevates them to the next level.
Why You’ll Love This Red Velvet Oreo Cookies Recipe
These Red Velvet Oreo Cookies are more than just your average cookie. They have a secret ingredient that sets them apart.
Unique Twist: The addition of buttermilk or sour cream introduces a subtle tanginess that perfectly complements the cocoa flavor. This also results in a softer, more tender crumb.
Buttermilk and sour cream contain lactic acid, which tenderizes the gluten in the flour. This creates a melt-in-your-mouth texture and enhances the overall red velvet experience. That little bit of tanginess wakes up the cocoa, bringing out all the best red velvet notes.
Taste: You’ll experience a delightful combination of red velvet and Oreo flavors, enhanced by that signature tangy note.
Texture: Expect a soft, chewy, and slightly crumbly texture that’s simply irresistible.
Easy: This recipe is relatively simple, making it perfect for intermediate bakers who want to impress.
Ingredients Needed
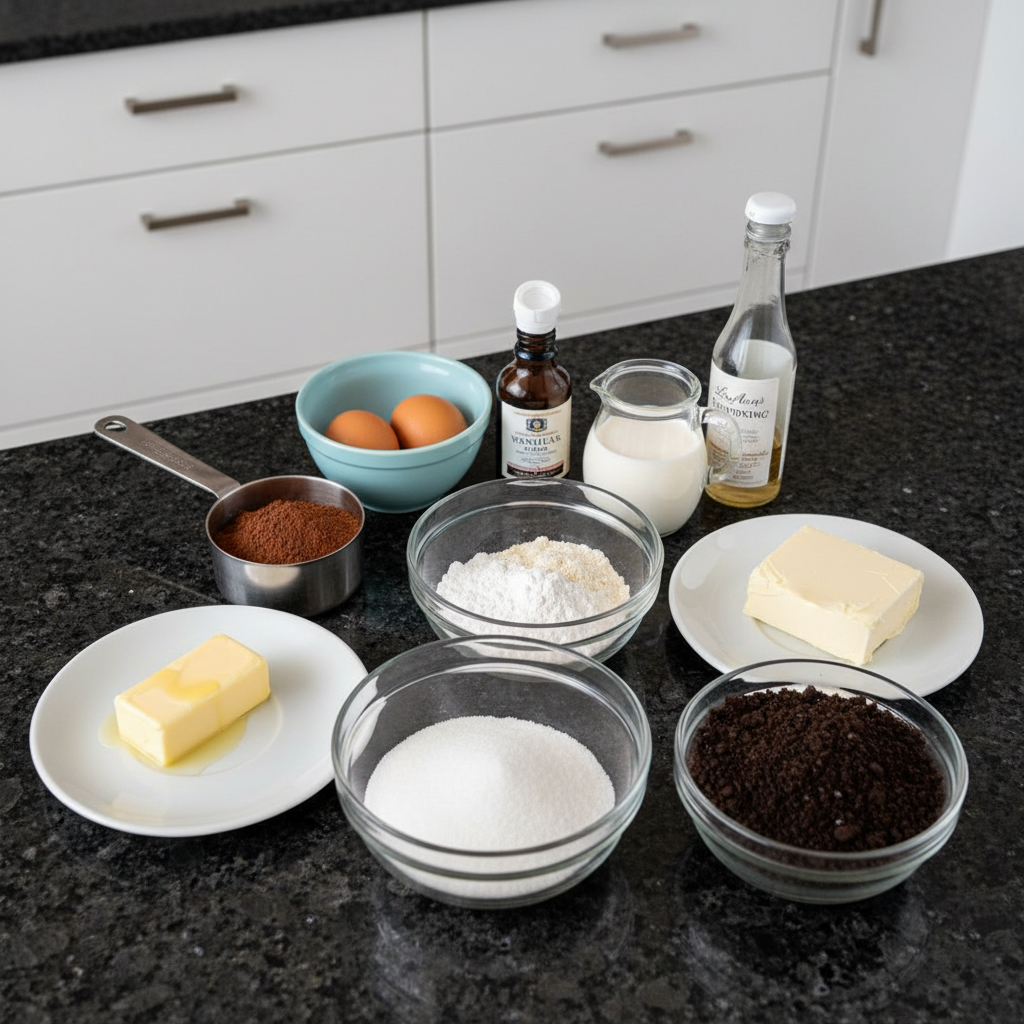
- ½ cup butter unsalted (softened)
- 1 1/4 cup granulated sugar
- 2 teaspoon LorAnn’s
- 1 large or extra large egg yolk (room temperature)
- 1 large or extra large whole egg
- 1 teaspoon pure vanilla extract
- 3 tablespoons dutch process (cocoa powder)
- 1 3/4 cups all purpose flour
- 3/4 teaspoon salt
- 1 tablespoon cornstarch
- 3/4 teaspoon baking powder
- 4 Regular oreo’s (pulverized into a fine crumb)
- 4 ounces cream cheese softened
- 1 cup unsalted butter softened
- 1 tablespoon heavy whipping cream
- ¼ teaspoon vanilla extract
- 3 cups powder sugar
- Pinch of salt
Ingredient Notes & Substitutions
Buttermilk/Sour Cream: Either buttermilk or sour cream can be used. If you don’t have either on hand, you can substitute by adding 1 tablespoon of white vinegar or lemon juice to 1 cup of milk. Let it sit for 5 minutes before using.
Dutch Process Cocoa Powder: Dutch process cocoa powder is treated to neutralize its acidity, resulting in a smoother, less bitter flavor and darker color. Regular cocoa powder can be substituted, but the color and flavor may be slightly different. You might want to add a pinch of baking soda if using regular cocoa.
If you’re interested in learning more, you can read about the differences between Dutch-processed and natural cocoa powder.
Red Food Coloring/Emulsion: Red food coloring gives red velvet its signature hue. Red velvet emulsion provides both color and flavor. For a more natural option, try using beet juice. Start with a small amount and add more until you reach your desired color. Be aware that it may slightly alter the flavor, so a little extra vanilla can help balance it out.
Here’s an interesting read on beet juice and its uses.
Oreo’s: Feel free to experiment with different Oreo varieties, like Golden Oreos or Mint Oreos, for a fun twist.
Flour: For a gluten-free version, use a gluten-free all-purpose flour blend. Be sure to add a binder like xanthan gum if your blend doesn’t already include it.

How to Make Red Velvet Oreo Cookies
Get Started
Preheat your oven to 350°F (180°C). Line a baking sheet with parchment paper. This prevents the cookies from sticking and makes cleanup a breeze. Set aside.
Cream Butter and Sugar
In a medium-sized bowl, using an electric hand mixer or in the bowl of a stand mixer fitted with the paddle attachment, cream together the slightly chilled butter and granulated sugar until light and fluffy, about 3 minutes. The mixture should be noticeably lighter in color and have a soft, airy texture.
Add Wet Ingredients
With a rubber spatula, scrape down the sides and the bottom of the bowl. Add the red gel food coloring, egg yolk, whole egg, and pure vanilla extract. Mix until well combined, about 30-60 seconds. The egg yolk adds richness and moisture to the cookies.
Combine Wet and Dry
Add the Dutch process cocoa powder, all-purpose flour, salt, cornstarch, and baking powder to the wet ingredients, mixing on low until just combined. Be careful not to overmix. Overmixing develops the gluten in the flour, resulting in tough cookies.
Scoop the Dough
Using a 4-tablespoon size cookie scoop, scoop out the dough onto the prepared baking sheets, leaving enough space between each cookie. You will get about 9 cookies. Using a cookie scoop ensures that all the cookies are the same size, so they bake evenly.
Bake the Cookies
Bake in the preheated oven for about 10-12 minutes, or until the edges are set and the centers are slightly soft. The cookies should have golden edges and a slightly soft center. While the cookies are still warm use the back of a spatula, or the bottom of a flat cup, gently flatten down the cookies until they’re about an inch 1/2 inch thick. Flattening ensures even cooking.
Cool the Cookies
Allow the cookies to cool on the baking sheets for a few minutes before transferring them to a wire rack to cool completely. This helps the cookies set and prevents them from breaking.
Prepare the Frosting
Once the cookies are completely cooled, you can frost them with the cream cheese frosting.
Crush the Oreos
Place the Oreo cookies in a food processor or blender and pulse until the Oreos are finely ground.
Cream Cheese and Butter
In a medium-sized bowl using a hand electric mixer, combine the butter and cream cheese. Cream on medium speed for about two minutes. Scrape down the sides and bottom of the bowl. Beat again for 2 more minutes. Make sure the cream cheese is at room temperature for a smooth frosting.
Add Sugar and Flavor
With the mixer on low speed, add the powdered sugar, followed by the vanilla, heavy whipping cream, and salt. Beat on low just until mixed. Then turn the mixer to medium-high speed and beat the mixture for 2-3 minutes. Adjust the amount of powdered sugar or cream to reach your desired consistency.
Incorporate Oreo Crumbs
With the rubber spatula, gently stir in the cookie crumbs until you start seeing gray streaks.
Frost and Decorate
Once the cookies are completely cooled, spread or pipe the cream cheese frosting onto the cookies.
Final Touch
Sprinkle extra crumbs on top and serve at room temperature or cold!
Achieving the Perfect Red Velvet Color
Red velvet’s signature color comes from a combination of ingredients. Originally, the reaction between cocoa and acidic ingredients like buttermilk created a reddish hue. Today, red food coloring is often added to intensify the color.
Red food coloring provides a vibrant, consistent color. Red velvet emulsion not only colors but also adds flavor. If you prefer a natural option, beet juice can be used. To prepare beet juice, simply blend cooked beets and strain the juice. Use a small amount, adding more until you reach your desired color. Keep in mind that beet juice can affect the flavor, so you might want to add a touch of extra vanilla extract.
Pro Tips & Troubleshooting
Pro Tips
Make sure eggs and cream cheese are at room temperature. This helps them incorporate more smoothly into the batter and frosting.
Use slightly chilled butter to prevent the cookies from spreading too much during baking.
Don’t overmix the dough. Overmixing develops the gluten, leading to tough cookies.
Use a cookie scoop for even baking. This ensures that all the cookies are the same size and bake at the same rate.
Slightly flatten the cookies before or after baking to help them bake evenly.
Adjust the frosting consistency with powdered sugar or cream to achieve your desired thickness.
Add extra Oreo crumbs on top for added texture and flavor.
Common Mistakes to Avoid
Overmixing the cookie dough. This leads to tough cookies.
Using too much flour. This results in dry, crumbly cookies.
Not chilling the butter slightly. This can cause the cookies to spread too thin.
Using cold cream cheese for the frosting. Cold cream cheese can result in a lumpy frosting.
Overbaking the cookies. Overbaked cookies will be dry and hard.
Not letting the cookies cool completely before frosting. The frosting will melt if the cookies are still warm.
Serving & Storage
Serving Ideas
Serve these Red Velvet Oreo Cookies at room temperature or cold.
Pair them with a glass of cold milk or coffee.
Add them to a dessert platter with other cookies and treats.
Crumble them over ice cream for an extra special treat.
Speaking of sweet treats, you might also enjoy these strawberry shortcake cookies.
Storage and Make-Ahead
Room Temperature: Store in an airtight container for up to 3 days.
Refrigerator: Store in an airtight container for up to 1 week.
Freezer: Freeze baked cookies for up to 2 months. You can also freeze the cookie dough in balls for easy baking later.
Conclusion
These Red Velvet Oreo Cookies are a delightful combination of flavors and textures. The tangy flavor, soft texture, and the ease of making them make this recipe a winner. Even if you’re a beginner baker, this recipe is straightforward and includes plenty of tips for success. Try experimenting with different Oreo flavors or adding other toppings for a personalized touch. Share photos of your creations and explore other cookie recipes for more baking inspiration!
FAQ
What makes red velvet cookies red, and can I use natural food coloring?
Traditionally, the red color came from the reaction between buttermilk and cocoa. Now, red food coloring is often used. You can use natural alternatives like beet juice, but be mindful of potential flavor alterations.
How do I prevent my cookies from spreading too thin?
Use slightly chilled butter, avoid overmixing the dough, and chill the dough if necessary.
Can I freeze red velvet Oreo cookies?
Yes, you can freeze both baked cookies and cookie dough. Store baked cookies in an airtight container for up to 2 months. Freeze cookie dough in balls for easy baking later.
What is the best way to store red velvet Oreo cookies?
Store them in an airtight container at room temperature for up to 3 days, in the refrigerator for up to 1 week, or in the freezer for up to 2 months.
What is the purpose of using slightly chilled butter?
Slightly chilled butter helps prevent the cookies from spreading too much during baking, resulting in a thicker, chewier cookie.
Can I substitute ingredients in this recipe?
Yes, you can substitute regular cocoa powder for Dutch process, or use dairy-free alternatives. See the ingredient substitutions section for more details.
Can I make the cookies ahead of time?
Yes, the dough can be made ahead and chilled or frozen. The baked cookies can also be stored for a few days. If you are looking for a make ahead option, consider these gingerbread cheesecake bars.
Red Velvet Oreo Cookies
Ingredients
Equipment
Method
- Preheat your oven to 350°F (180°C). Line a baking sheet with parchment paper. This prevents the cookies from sticking and makes cleanup a breeze. Set aside.
- In a medium-sized bowl, using an electric hand mixer or in the bowl of a stand mixer fitted with the paddle attachment, cream together the slightly chilled butter and granulated sugar until light and fluffy, about 3 minutes. The mixture should be noticeably lighter in color and have a soft, airy texture.
- With a rubber spatula, scrape down the sides and the bottom of the bowl. Add the red gel food coloring, egg yolk, whole egg, and pure vanilla extract. Mix until well combined, about 30-60 seconds. The egg yolk adds richness and moisture to the cookies.
- Add the Dutch process cocoa powder, all-purpose flour, salt, cornstarch, and baking powder to the wet ingredients, mixing on low until just combined. Be careful not to overmix. Overmixing develops the gluten in the flour, resulting in tough cookies.
- Using a 4-tablespoon size cookie scoop, scoop out the dough onto the prepared baking sheets, leaving enough space between each cookie. You will get about 9 cookies. Using a cookie scoop ensures that all the cookies are the same size, so they bake evenly.
- Bake in the preheated oven for about 10-12 minutes, or until the edges are set and the centers are slightly soft. The cookies should have golden edges and a slightly soft center. While the cookies are still warm use the back of a spatula, or the bottom of a flat cup, gently flatten down the cookies until they're about an inch 1/2 inch thick. Flattening ensures even cooking.
- Allow the cookies to cool on the baking sheets for a few minutes before transferring them to a wire rack to cool completely. This helps the cookies set and prevents them from breaking.
- Once the cookies are completely cooled, you can frost them with the cream cheese frosting.
- Place the Oreo cookies in a food processor or blender and pulse until the Oreos are finely ground.
- In a medium-sized bowl using a hand electric mixer, combine the butter and cream cheese. Cream on medium speed for about two minutes. Scrape down the sides and bottom of the bowl. Beat again for 2 more minutes. Make sure the cream cheese is at room temperature for a smooth frosting.
- With the mixer on low speed, add the powdered sugar, followed by the vanilla, heavy whipping cream, and salt. Beat on low just until mixed. Then turn the mixer to medium-high speed and beat the mixture for 2-3 minutes. Adjust the amount of powdered sugar or cream to reach your desired consistency.
- With the rubber spatula, gently stir in the cookie crumbs until you start seeing gray streaks.
- Once the cookies are completely cooled, spread or pipe the cream cheese frosting onto the cookies.
- Sprinkle extra crumbs on top and serve at room temperature or cold!
Notes
Lia Monet is a food blogger, recipe developer, and the founder of EasyAsMeals, a food blog focused on easy recipes, quick dinners, and everyday home cooking. She creates tested, family-friendly recipes using simple ingredients to help busy families cook affordable and delicious meals at home.