There’s nothing quite like the satisfying crunch of a homemade pickle. I remember my grandmother’s dill pickles, always crisp and bursting with flavor. Now, I make my own fermented pickles at home! They’re not only delicious but also packed with health benefits, offering a unique tangy taste that sets them apart from ordinary vinegar-based pickles. This fermented pickles recipe will guide you through a simple method to create crunchy, flavorful pickles with a special twist for enhanced taste and safety.
Why You’ll Love This Fermented Pickles Recipe
This recipe brings the traditional pickle into new territory. Here’s why I think you’ll love it:
Unique Twist: The addition of 1/4 teaspoon of mustard powder to the brine makes all the difference.
Better Flavor and Safety: Mustard powder adds a subtle savory depth that complements the salt and spices. It also acts as an antimicrobial agent, inhibiting mold growth and ensuring a safer ferment.
Easy to Make: You can easily make these delicious fermented pickles right in your own kitchen. It’s a simple process that anyone can follow.
Healthier Option: These homemade pickles are healthier than store-bought versions. They are full of beneficial probiotics that support good gut health.
Customizable Spice Level: You can adjust the spices to suit your own taste preferences. Make them as mild or as spicy as you like!
Ingredients Needed
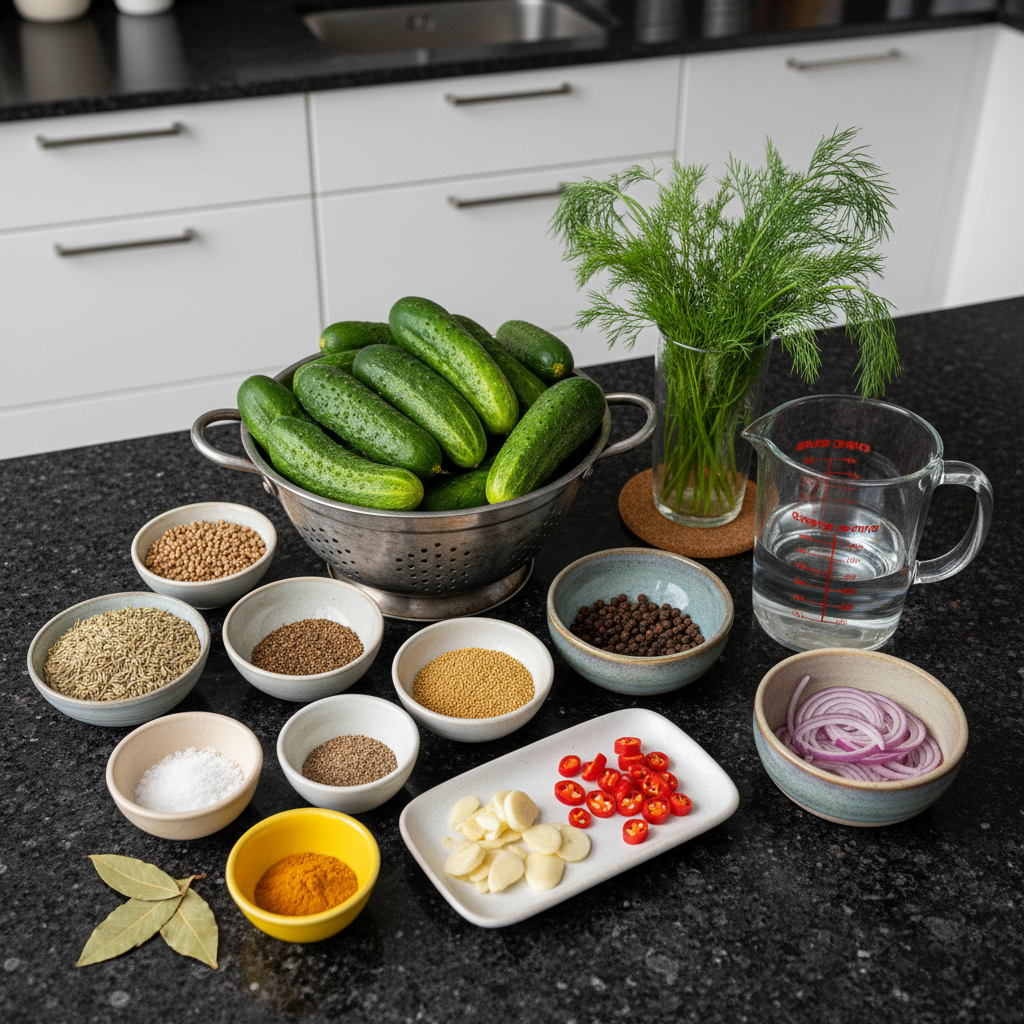
Here’s what you’ll need to make these amazing fermented pickles:
2- 2 1/2 lbs pickling cucumbers– all similar size ( 5 inches)
5 cups filtered water or tap water (that is not overly chlorinated)
2 tablespoons fine sea salt or Himalayan salt (or basically one heaping teaspoon fine sea salt (7 grams) per one cup of water, to make a 3% brine.) * see notes.
1/4 teaspoon turmeric (optional, adds a “fresh” flavor)
1 teaspoon each: fennel seeds, coriander seeds, allspice, peppercorns, dill seeds, mustard seeds, celery seeds- and feel free to add more peppercorns!
10-20 garlic cloves, sliced (or double for extra garlicky)
1/2 onion, thinly sliced (optional)
big handful of fresh dill
1-3 fresh red chilies – or dried arbol chilies, or add chili flakes (all optional)
3-4 bay leaves (or a grape leaf or oakleaf) – these are sources of tannic acid to help them stay crisp.
Ingredient Notes & Substitutions
Pickling Cucumbers: Using the right cucumbers is key. Pickling cucumbers, like Kirby cucumbers, are small, firm, and have bumpy skin. These are perfect for pickling because they stay crisp. Look for them at farmers’ markets or grocery stores in the US. If you can’t find pickling cucumbers, other small cucumbers can be used, but the texture may not be quite the same.
Salt: I prefer using fine sea salt or Himalayan salt for my brine. These salts don’t contain iodine or anti-caking agents, which can interfere with fermentation. The salt percentage is crucial for proper fermentation; a 3% brine is generally recommended. For a longer fermentation, you can increase the salt slightly, but be mindful of the flavor.
Spices: Feel free to get creative with the spices! Adding mustard seeds will give a more traditional flavor. Adjust the amount of chili to control the heat level. Dill seeds and celery seeds are also great additions for unique flavor profiles. Fresh horseradish root adds a nice kick too.
Water: It’s important to use non-chlorinated water because chlorine can inhibit the fermentation process. Filtered water is ideal, but tap water that has sat out for 24 hours can also work.
Tannic Acid: Bay leaves, grape leaves, or oak leaves contain tannic acid, which helps keep the pickles crisp. If you have access to grape or oak leaves, they can be a great alternative to bay leaves.
How to Make Fermented Pickles
Follow these simple steps to create delicious, crunchy fermented pickles at home:
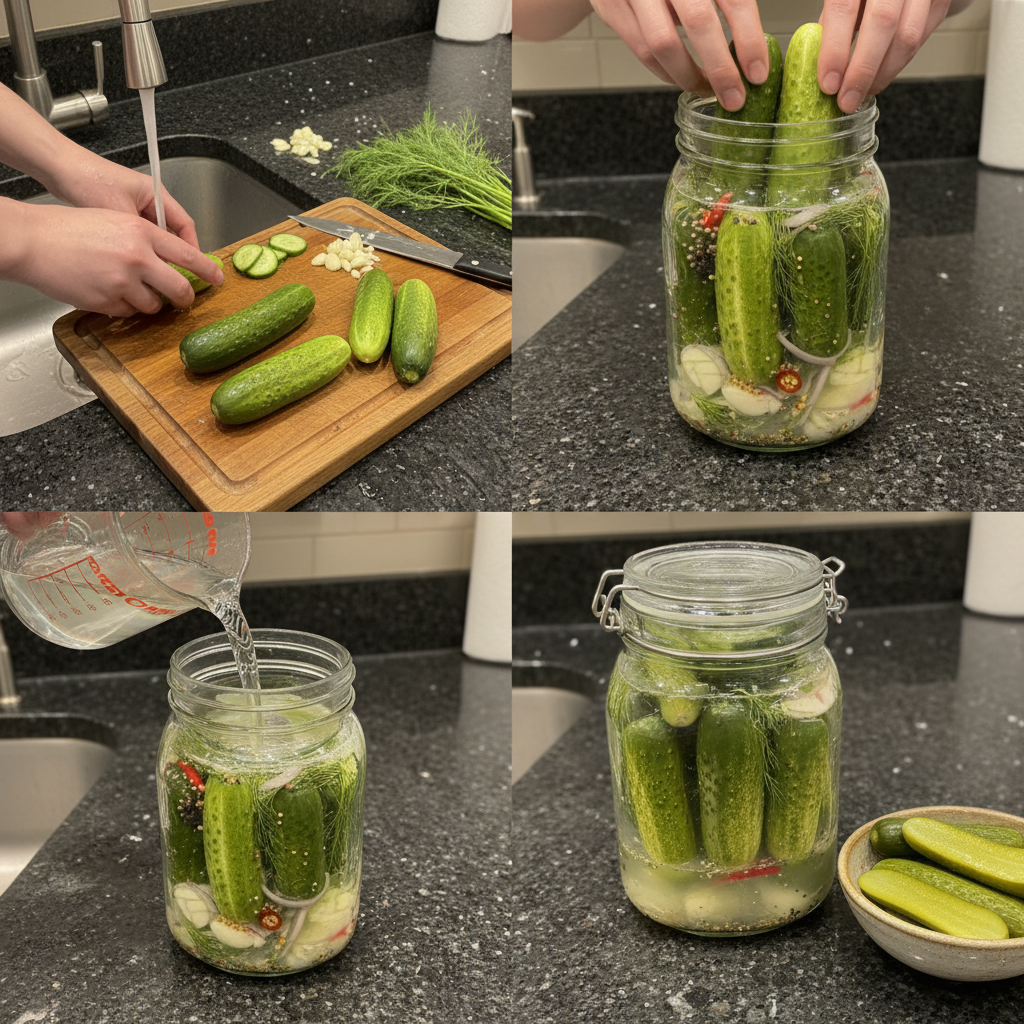
Step 1: Prep Cucumbers
Rinse the pickling cucumbers thoroughly. Remove about 1/16-inch from the blossom end of each cucumber; this helps prevent softening. Place the prepared cucumbers in an ice-water bath for 15-30 minutes. This ice bath is essential for achieving that perfect crispness. After the ice bath, the cucumbers should feel firm and look vibrant.
Step 2: Make the Brine
In a large bowl, mix 2 tablespoons of fine sea salt or Himalayan salt with 5 cups of cold, non-chlorinated water. Stir until the salt is completely dissolved. The cold water helps the salt dissolve more slowly and evenly. Make sure to use non-chlorinated water to avoid inhibiting the fermentation process.
Step 3: Prepare Jars & Utensils
Wash your hands, jars (a two-quart mason jar works well), and any utensils you’ll be using with soap and water. Sterilizing isn’t necessary; just ensure everything is clean to prevent contamination.
Step 4: Assemble
In the clean mason jar, place all the whole spices (fennel seeds, coriander seeds, allspice, peppercorns, dill seeds, mustard seeds, and celery seeds) at the bottom. Add the sliced garlic, onions (if using), turmeric (if using), and fresh dill. With clean hands, tightly pack one layer of cucumbers standing on end. Then, add the bay leaves. Pack a second layer of cucumbers standing on end, pressing everything down to leave about 1 1/2 inches of headroom. The aroma of the combined spices should be quite enticing!
Pour the saltwater brine over the cucumbers, ensuring they are fully submerged. Use fermentation weights to keep the cucumbers under the brine. This is crucial to prevent mold growth. Remove any spices that may have floated to the surface; these can also mold.
Cover the jar loosely with a lid or a cloth. The pickles will bubble, so it’s important that air can escape. I like to use a cloth secured with a rubber band.
Step 5: Ferment
Place the jar in a pan or bowl to catch any overflow. Keep it in a cool, dark place, ideally between 60-70°F (a basement or lower kitchen cupboard works well). Allow the pickles to ferment for 2-3 days, checking regularly for bubbles or overflow. Fermentation temperature is key; cooler temperatures (60-70F) result in crisper pickles. If your home is warmer, try placing the jar in a cooler with ice packs to maintain the right temperature.
Half-sour pickles will take 3-5 days and will have crisp, white interiors. Full-sour pickles require 14-21 days. Remember that colder temperatures may slow down fermentation, while warmer temperatures speed it up. As fermentation progresses, you’ll notice bubbles forming and the brine becoming cloudy.
Step 6: Check and Inspect
After 2 days, check for signs of fermentation: bubbles, overflow, or cloudiness. Tap the jar and watch for tiny bubbles rising to the top. I usually ferment mine for 3-4 days because I love crunchy pickles! The brine will get cloudy as it ferments – a good sign! You can taste them at any point after you see bubbles to assess their progress. Longer fermentation yields tangier pickles but also makes them softer and they lose their vibrant color. The choice is yours.
At this point, once you see active bubbles, you can transfer the jar to the refrigerator, where fermentation will continue, but at a much slower pace. Keep the pickles submerged in the brine.
Step 7: Refrigerate
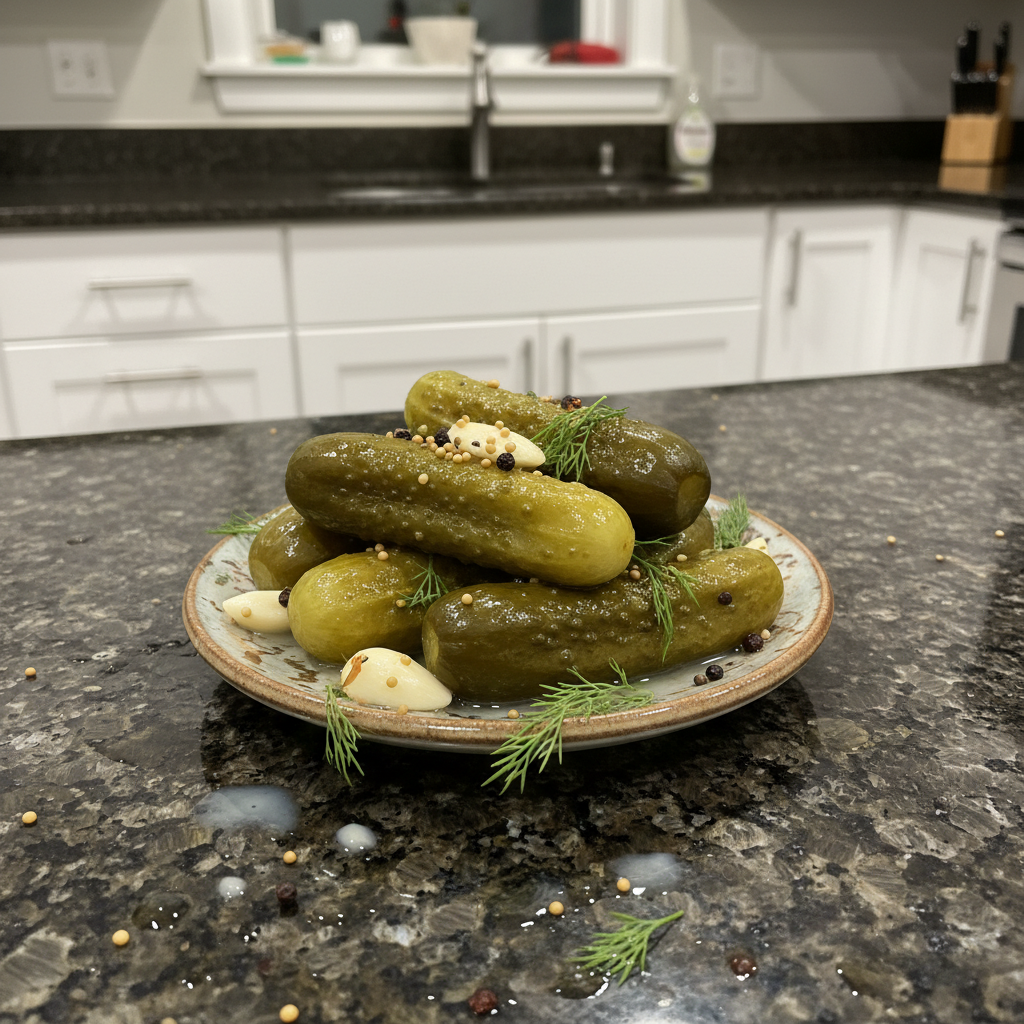
Once the pickles are chilled, give them a taste. They should be crispy, flavorful, and slightly tangy. If you prefer a tangier or softer pickle, you can take them out and let them ferment for a few more days.
Step 8: Storage
If you like fizzy brine, tighten the lid and burp it every week or so, or consider using an airlock. If you prefer not to worry about it, loosely twist the lid so gases can escape. This method ensures the pickles remain safe and delicious.
Troubleshooting Common Fermentation Problems
Fermentation can sometimes present challenges. Here’s how to tackle some common issues:
Kahm Yeast
Kahm yeast is a harmless white film that can form on the surface of your brine. It’s usually a sign that the fermentation environment isn’t acidic enough or that there’s too much oxygen. To remove it, simply skim it off the surface with a clean spoon. It won’t ruin your pickles!
Mushy Pickles
Mushy pickles can result from a few factors. The fermentation temperature might be too high, or there might not be enough tannic acid in the brine. Ensure you’re using bay leaves, grape leaves, or oak leaves, and keep the fermentation temperature between 60-70°F. Also, make sure your salt ratio is correct; too little salt can lead to mushy pickles.
Mold is a serious concern. If you are looking for more ways to increase the shelf life of food, you can also make your own homemade chamoy sauce which has a very long shelf life due to the high acidity.
Mold Growth
Mold is a serious concern. It usually appears as fuzzy growth on the surface of the brine or pickles. If you see mold, discard the entire batch. Prevent mold by ensuring the cucumbers are fully submerged, removing any floating spices, and using the correct brine concentration. Our unique twist—adding mustard powder—also helps inhibit mold growth thanks to its antimicrobial properties.
Different Pickling Cucumber Varieties
Choosing the right cucumber can make a big difference in the final product:
Kirby Cucumbers
Kirby cucumbers are a popular choice for pickling. They are small, bumpy, and have a crisp texture, making them ideal for absorbing the brine and maintaining their crunch throughout the fermentation process.
National Pickling Cucumbers
National Pickling cucumbers are another excellent option. They are firm, have small seeds, and a thin skin, all of which contribute to a superior pickled product.
Other Varieties
While less common, gherkins and other small, firm cucumber varieties can also be used for pickling. When selecting cucumbers, look for those that are firm, have small seeds, and thin skin for the best results.
Pro Tips & Troubleshooting
Pro Tips
Ferment at cooler temps (60-70F) to keep pickles crisp. If your home is hot, try placing in a cooler with ice. Monitor the brine temperature.
Always use clean equipment to prevent contamination and potential mold growth.
Use fermentation weights to keep the cucumbers fully submerged below the brine. This prevents unwanted microbial growth and ensures even fermentation.
Taste the pickles regularly to monitor their progress and adjust fermentation time according to your preference.
Remember, the longer you ferment them (unrefrigerated), the tangier they will get, but they will also get softer. Find the perfect balance for your taste!
Consider using an airlock for long-term storage or if you want a fizzy brine. This will help maintain an anaerobic environment.
Use filtered water for the best flavor and to avoid inhibiting the fermentation process due to chlorine or other additives.
Common Mistakes to Avoid
Using iodized salt can inhibit fermentation. Always opt for sea salt or Himalayan salt.
Not removing the blossom end of the cucumbers can lead to softening due to enzymes present in the blossom.
Fermenting at too high a temperature can result in mushy pickles. Keep the temperature between 60-70°F.
Not keeping the cucumbers submerged below the brine can lead to mold growth. Use fermentation weights to prevent this.
Always fish out any floating spices with a slotted spoon to prevent mold from forming on the surface of the brine.
Using overly chlorinated water can inhibit fermentation. Use filtered or non-chlorinated water.
Serving & Storage
Serving Ideas
Fermented pickles are incredibly versatile. Here are some serving suggestions:
Enjoy them as a low-calorie snack straight from the jar.
Slice them and add them to sandwiches for a tangy crunch.
Serve them as a tasty side dish with grilled meats or veggie burgers.
Drink a shot of the brine for a probiotic boost!
Get adventurous and make a Gin & Brine Martini.
Pair them with charcuterie and cheese boards for a delightful contrast of flavors.
If you are serving your fermented pickles with burgers, be sure to serve them with the best bean and rice burrito recipe.
Storage and Make-Ahead
Store fermented pickles in the refrigerator for several months. The flavor will continue to develop over time, becoming even more complex. For long-term storage without refrigeration, use airlocks to maintain an anaerobic environment. You can learn more about anaerobic conditions and food preservation on the National Institute of Health website. Pickles can also be stored at room temperature in a cool, dark place for a few weeks with proper airlocks.
Conclusion
Making fermented pickles at home is a rewarding experience. Not only do you get delicious, tangy pickles, but you also reap the health benefits of probiotics. Plus, it’s an easy and customizable process. Don’t forget our unique twist of adding mustard powder for enhanced flavor and mold prevention. It truly makes a difference!
So, gather your ingredients, follow this beginner-friendly recipe, and start experimenting with different spices and fermentation times to create your perfect batch of fermented pickles. Share this recipe with your friends and family, and don’t forget to explore other fermentation recipes on the blog!
FAQ
Here are some frequently asked questions about making fermented pickles:
How long does it take to ferment pickles?
Fermentation time depends on temperature and desired sourness. Generally, 3-5 days for half-sour and 14-21 days for full-sour pickles.
What is the ideal salt to water ratio for fermented pickles?
The ideal ratio is approximately 3% brine, which is 2 tablespoons of salt per 5 cups of water. This ensures proper fermentation and prevents undesirable bacteria growth.
How do I keep my pickles crisp during fermentation?
Use pickling cucumbers, remove the blossom end, keep the fermentation temperature cool, add a source of tannins (bay leaves, grape leaves), and ensure proper salt concentration.
How do I know if my fermented pickles have gone bad?
Look for signs of mold (especially fuzzy mold), unusual odors, or a slimy texture. If in doubt, discard the batch.
What are the best cucumbers for pickling?
Kirby and National Pickling cucumbers are ideal due to their firm texture and small seed cavity.
How do I prevent mold from growing during fermentation?
Use clean equipment, ensure cucumbers are fully submerged, remove floating spices, and maintain proper salt concentration. Our unique twist, mustard powder, also helps prevent mold.
Easy Fermented Pickles Recipe: Crispy & Flavorful!
Ingredients
Equipment
Method
- Rinse the pickling cucumbers thoroughly. Remove about 1/16-inch from the blossom end of each cucumber; this helps prevent softening.
- Place the prepared cucumbers in an ice-water bath for 15-30 minutes. This ice bath is essential for achieving that perfect crispness. After the ice bath, the cucumbers should feel firm and look vibrant.
- In a large bowl, mix 2 tablespoons of fine sea salt or Himalayan salt with 5 cups of cold, non-chlorinated water. Stir until the salt is completely dissolved.
- The cold water helps the salt dissolve more slowly and evenly. Make sure to use non-chlorinated water to avoid inhibiting the fermentation process.
- Wash your hands, jars (a two-quart mason jar works well), and any utensils you'll be using with soap and water. Sterilizing isn't necessary; just ensure everything is clean to prevent contamination.
- In the clean mason jar, place all the whole spices (fennel seeds, coriander seeds, allspice, peppercorns, dill seeds, mustard seeds, and celery seeds) at the bottom.
- Add the sliced garlic, onions (if using), turmeric (if using), and fresh dill.
- With clean hands, tightly pack one layer of cucumbers standing on end. Then, add the bay leaves. Pack a second layer of cucumbers standing on end, pressing everything down to leave about 1 1/2 inches of headroom. The aroma of the combined spices should be quite enticing!
- Pour the saltwater brine over the cucumbers, ensuring they are fully submerged. Use fermentation weights to keep the cucumbers under the brine. This is crucial to prevent mold growth.
- Remove any spices that may have floated to the surface; these can also mold.
- Cover the jar loosely with a lid or a cloth. The pickles will bubble, so it's important that air can escape. I like to use a cloth secured with a rubber band.
- Place the jar in a pan or bowl to catch any overflow. Keep it in a cool, dark place, ideally between 60-70°F (a basement or lower kitchen cupboard works well).
- Allow the pickles to ferment for 2-3 days, checking regularly for bubbles or overflow. Fermentation temperature is key; cooler temperatures (60-70F) result in crisper pickles. If your home is warmer, try placing the jar in a cooler with ice packs to maintain the right temperature.
- Half-sour pickles will take 3-5 days and will have crisp, white interiors. Full-sour pickles require 14-21 days. Remember that colder temperatures may slow down fermentation, while warmer temperatures speed it up. As fermentation progresses, you’ll notice bubbles forming and the brine becoming cloudy.
- After 2 days, check for signs of fermentation: bubbles, overflow, or cloudiness. Tap the jar and watch for tiny bubbles rising to the top.
- I usually ferment mine for 3-4 days because I love crunchy pickles! The brine will get cloudy as it ferments – a good sign! You can taste them at any point after you see bubbles to assess their progress. Longer fermentation yields tangier pickles but also makes them softer and they lose their vibrant color. The choice is yours.
- At this point, once you see active bubbles, you can transfer the jar to the refrigerator, where fermentation will continue, but at a much slower pace. Keep the pickles submerged in the brine.
- Once the pickles are chilled, give them a taste. They should be crispy, flavorful, and slightly tangy. If you prefer a tangier or softer pickle, you can take them out and let them ferment for a few more days.
- If you like fizzy brine, tighten the lid and burp it every week or so, or consider using an airlock. If you prefer not to worry about it, loosely twist the lid so gases can escape. This method ensures the pickles remain safe and delicious.